Car Detailing Order of Operations
You’ll follow a strict top-to-bottom sequence: wash with car shampoo, dry top-down, test spots, then decontaminate (clay bar or iron remover). Tackle water spots by type—gentle cleaners first, vinegar or dedicated remover next, clay for residue, polish only for etched marks.
Correct defects with coarse-to-fine pad and compound progression; monitor heat. Then seal or coat after proper cure. Finish with trim care and inspect under direct light. Continue and you’ll get the full procedure.
Quick Overview
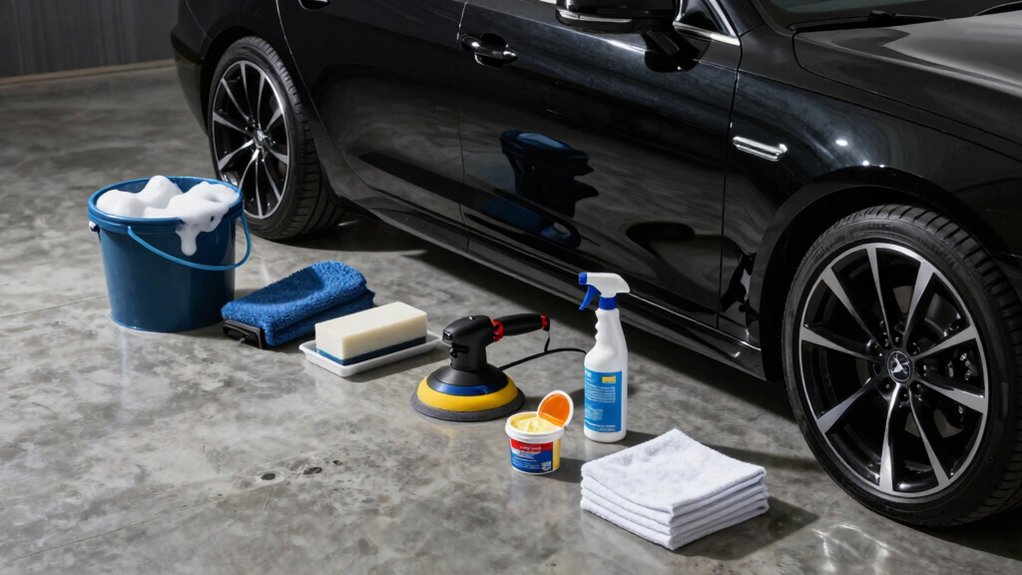
- Start top-down: rinse and wash from roof to wheels, using foam/pre-rinse then two-bucket soapy wash to avoid contamination.
- Dry with soft towels or blowers, working top-down. Finish with distilled/RO rinse to prevent new water spots.
- Address water spots: test vinegar or spot remover. Then clay bar for residue; polish only if spots are etched.
- Correct paint defects using pad progression: coarse compounding, medium polishing, then fine finishing pads and polishes.
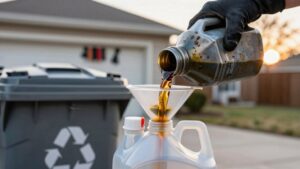
- Protect and cure: apply sealant/coating per manufacturer cure times. Avoid heavy exposure until tack-free and fully cured.
Water Spot Removal Chart
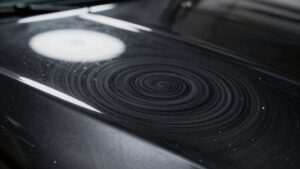
What kind of water spot are you dealing with? Identify fresh versus etched: Fresh wipes away or feels rough when wet; etched shows craters and resists washing. Use the chart below to pick method and expected result.
| Spot Type | Best Method | Result |
|---|---|---|
| Fresh/Topical | Soapy wash | Removes safely |
| Fresh (mineral) | Vinegar solution | Dissolves salts |
| Light residue | Quick detailer | Lifts without scrub |
| Embedded minerals | Clay bar | Lifts contaminants |
Follow steps: Start with soapy wash. Then test vinegar or water spot remover on a small area. Clay if residue remains. Reserve polishing for etched spots. Dry top-down, rinse with distilled/RO water, and finish with sealant to prevent recurrence. Avoid off topic banter and unrelated trends during procedure.
Paint Cure Times
Wondering how long protective products and paintwork need before you can handle or expose the car to the elements? You’ll plan around paint cure times and monitor drying conditions to avoid marring or trapping moisture. Cure rates vary by product type, temperature, and humidity; therefore, follow manufacturer minimums and extend times in cool or humid environments.
Short-term handling: Light contact after specified tack-free time; avoid heavy pressure or polishing. Full exposure: Wait recommended full cure, which is often 24–72 hours for many sealants and longer for ceramic coatings.
Accelerated curing: Controlled heat and low humidity speed cure; however, avoid overheating clearcoat.
You’ll document ambient conditions and adhere to conservative windows to protect finish integrity and longevity.
Recommended Polishing Pad Grit
You’ll choose pad grit based on the cut you need: coarse pads for aggressive compounding, medium for polishing, and soft for finishing. Match pad aggressiveness to paint condition and the compound or polish you’re using. Monitor heat build-up to avoid burn-through.
Always test a small area first so you can adjust pad/compound pairing safely.
Pad Grit Basics
Choosing the right pad grit guarantees you get the cut and finish you need without wasting time or risking paint damage. You select pad grit based on defect severity and paint cure time: softer, newer paint with short paint cure needs finer grits to avoid heat buildup. Older, fully cured paint tolerates more aggressive options.
Match pad grade to polish abrasiveness and machine speed; progress from coarser to finer as you remove defects. Address localized issues like a water spot with a targeted, lower-grit approach rather than treating entire panels. Test a small area, check for haze, edge burn, or lift, then refine.
Consistent, controlled passes and correct pad selection minimize rework and protect clear coat integrity.
Aggressive Vs. Fine
You already learned how pad grade matches polish aggressiveness and paint condition. Now compare aggressive and fine pad grits to pick the right level of cut and finish. You’ll choose aggressive techniques only when deep defects require rapid material removal. Coarse pads with cutting compounds remove scratches and heavy oxidation faster but leave heavier micro-marring.
Use aggressive pads for poor-condition paint after assessment. Know you’ll need follow-up refinement. Fine finishing uses soft pads and light polishes to restore clarity and gloss, eliminating haze and smoothing micro-marring left by cutting. Sequence pads from coarse to fine, testing small areas and verifying results before moving on.
Match pad grit to your correction goal: prioritize cut, then refine to finish. Avoid unnecessary passes.
Surface Paint Considerations
Surface paint dictates the pad grit you’ll use, so match pad aggressiveness to the paint’s hardness and defect depth: soft, thin-clear coats and delicate finishes need fine, low-cut pads to avoid burning or thinning. Thick, hard, or heavily oxidized paint tolerates coarser pads for faster defect removal followed by refinement.
You’ll assess hardness with a simple fingernail or tape test. Note clearcoat thickness and gauge defect depth visually. Use micro‑finishing pads for light swirls and surface film removal to preserve gloss. For moderate defects, medium-cut pads balance removal and finish. Always finish with a refining pad to restore clarity.
Confirm wax compatibility before sealing; some pads and polishes leave residues that affect bonding and cure.
Compound Compatibility
How should you match compound aggressiveness to pad grit? You’ll select pad grit based on compound cut and paint condition: heavy-cut compounds pair with open-cell, dense-cut pads (coarse wool or heavy foam) to remove deep defects efficiently. Medium-cut compounds suit medium-firm foam pads for balanced removal and control. Light-cut compounds and finishing polishes require soft, fine-grit foam or microfiber finishing pads to refine gloss and eliminate haze.
Ensure compound compatibility by testing small sections, noting heat build and finish quality, and adjusting pad type before full-panel work. Always move from more aggressive pad/compound combinations to finer ones, progressively reducing abrasiveness until desired clarity is achieved. Record successful pairings for consistent future results.
Heat And Caution
Because polishing generates frictional heat, monitor pad temperature and work in controlled passes to avoid burning clear coat or causing swirl marks. You’ll select pad grit based on defect severity: coarse pads for heavy correction, medium for blended correction, fine for light refining.
Keep dwell time short, use moderate pressure, and overlap passes to maintain consistent removal without glazing. Between sections, feel pad temperature; if it’s hot, stop and let it cool. Use backing plates and quality pads to dissipate heat.
For every operation, practice heat safety and caution handling: wear gloves, keep fingers clear of spinning platens, and avoid excessive speed settings. This methodical approach preserves clear coat integrity while achieving efficient correction.
Finishing Polishes
After monitoring pad temperature and finishing corrective passes, you’ll shift to finishing polishes that refine light holograms, micro-marring, and enhance gloss. Choose pad grit based on surface paint considerations: ultra-soft foam (very fine) for delicate, single-stage or thin clear coats; soft foam (fine) for slightly weathered clears; medium-fine for one-step correction when minor defects remain.
Match polish abrasiveness to pad grit; use less aggressive polish with finer pads to avoid burning or over-thinning. Work in small, controlled sections at low speed. Keep the pad cool and inspect results under direct light. If surface paint considerations indicate older or repaired panels, test an inconspicuous area first.
Finish with a light polishing pass and a residue-free wipe before protection.
Frequently Asked Questions
When Should I Clay Bar Versus Using a Chemical Decontaminant?
You clay bar versus chemical decontaminant depending on contamination type and access. Use a clay bar for stubborn, embedded particles after washing when you feel roughness; it physically removes bonded contaminants.
Use a chemical decontaminant when contamination is light, widespread, or clay might risk marring: it dissolves iron, rail dust, or old sealants. If in doubt, wash, test by touch, then choose clay for heavy spots and chemical for general decon.
How Long Before Driving After Ceramic Coating Application?
You can drive gently after 24 hours, but full ceramic curing usually takes 7 days. During the first day, avoid heavy washing, high-speed driving, and abrasive contact. Ensure coating ventilation in the workspace during application to prevent trapped solvents.
For optimum hardness and chemical resistance, keep exposure to water, contaminants, and pressure washers minimal for the first week. Follow the manufacturer’s specific cure timeline for best results.
Can I Use Household Cleaners on Interior Leather?
No, you shouldn’t use household cleaners on interior leather. Household cleaners can strip leather’s natural oils, cause drying, cracking, or discoloration.
Instead, clean gently with a pH-balanced leather cleaner. Then, perform leather conditioning to replenish oils and protect suppleness.
Test any product on an inconspicuous area first; use soft brushes or microfiber, and follow manufacturer instructions to avoid damage and ensure long-lasting, well-maintained leather surfaces.
What’s the Safest Way to Clean Fabric Headliners?
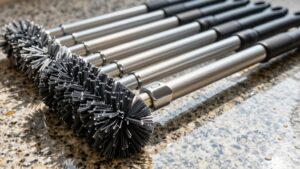
Use a soft-bristled brush and a microfiber towel to gently agitate a mild, pH-neutral upholstery cleaner on fabric headliners. Don’t soak the fabric.
Work in small sections, blot excess moisture immediately, and allow thorough air drying to avoid sagging. After it’s dry, apply a light mist of fabric protection designed for automotive headliners to repel stains and UV.
Test any product in an inconspicuous area first.
How Often Should I Reapply Paint Sealant or Wax?
You should reapplication of wax or sealant depends on product longevity: Wax typically needs reapplication every 6–12 weeks, while synthetic paint sealants last 3–6 months and ceramic coatings last years.
Set a waxing schedule based on product claims, climate, and washing frequency. Inspect beading to decide. You’ll reapply sooner in harsh sun, heavy rain, or frequent washing.
Keep records and test small panels to confirm protection before full reapplication.
Conclusion
You’ve walked through water spot removal, cure times, pad grit choices, and polish compatibility so you can finish cleanly and safely. Start with the least aggressive pad that removes the defect. Work progressively only as needed, and respect paint cure times to avoid holograms or burns.
Match compounds and pads, monitor heat, and pause for inspection. Finish with a fine polish. Then protect the surface: consistent, cautious steps deliver repeatable, lasting results.