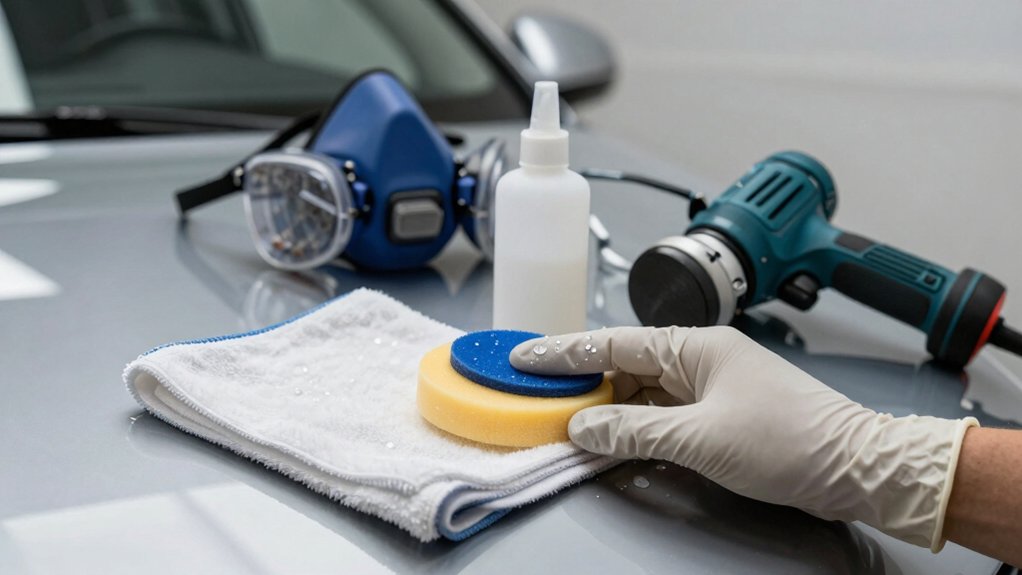
Car Detailing Personal Protective Equipment
You’ll use properly fitted gloves, respirators, and headgear sized by measurements and verified by fit testing to meet compliance.
Document sizes, cartridge types, installation dates, and fit-test records.
Match glove material and thickness to chemical resistance tables and replace on contamination or breakthrough.
Implement cartridge change schedules, visual/physical checks, and tracking tied to tasks and exposure limits.
Maintain stock with lead-time buffers, audit quarterly, and have authorized emergency replacement procedures.
Continue for full protocols and forms.
Quick Overview
- Wear nitrile gloves (9–14 mil) sized for a snug fit; round up if between sizes and record glove size for compliance.
- Use eye protection (impact-rated safety glasses or goggles) to prevent chemical splashes during cleaning and polishing.
- Fit and verify respirators for solvent-based products. Document cartridge type, installation date, and fit-test records.
- Select glove material using chemical resistance tables. Replace gloves after contamination, puncture, or extended exposure.
- Maintain PPE stock based on usage rates and supplier lead times. Audit quarterly and include emergency replacement procedures.
PPE Size & Fit Chart
How should your PPE fit to provide intended protection? You must verify measurements against standards: glove compatibility requires snug fit with fingers reaching tips; round up when between sizes. Headgear sizing uses circumference measured above eyebrows; pulling tape snug but not tight.
Follow fit verification protocols: use soft tape, order larger when in doubt, and confirm respirator fit testing. Use numeric glove sizes and helmet size ranges (6-1/2 to 7-3/4 in). Select eyewear per ANSI/ISEA Z87.1-2015 and note single vs two-lens measurements. Document measurements and chosen sizes for compliance records, and repeat fit checks when changing manufacturers or adding layers.
| Item | Measurement | Action |
|---|---|---|
| Gloves | Palm to fingertip | Size → compatibility |
| Hard hat | Head circumference | Select snug fit |
| Respirator | Face width/length | Fit test required |
Glove Chemical Resistance Table
Now that you’ve verified glove sizes and performed respirator fit tests, evaluate chemical compatibility before choosing gloves for each detailing task. Use a glove chemical resistance table to match glove material to specific solvents, acids, alkalis, and cleaners. Verify permeation rates, breakthrough times, and degradation for nitrile, neoprene, and PVC variants. Record glove sizing and thickness alongside chemical ratings to ensure both fit and protection meet task-specific hazards.
- Consult supplier tables for permeation; min 30 min for routine cleaners.
- Prioritize 9–14 mil nitrile for high-risk solvents; note degradation signs.
- Replace disposable gloves after contamination, puncture, or extended exposure.
Document selections in SOPs to satisfy compliance and training audits.
Respirator Cartridge Change Schedule
You’ll establish a cartridge change schedule based on cartridge change indicators, applicable chemical exposure limits, and manufacturer guidance to ensure respirator effectiveness.
Perform scheduled replacement intervals supplemented by visual and physical checks for damage, odor breakthrough, or increased breathing resistance. Document each inspection and change.
Keep precise records and a tracking system tied to work tasks and airborne contaminant measurements to demonstrate compliance.
Cartridge Change Indicators
When should you replace respirator cartridges? You must monitor cartridge change using objective indicators, not guesswork. Use manufacturer service life tables and establish a schedule interval based on contaminant concentration, work duration, temperature, and humidity.
Integrate end-of-service-life indicators (ESLI) where available: colorimetric or electronic; and record readings in a maintenance log. If ESLIs aren’t provided, apply a conservative fixed-time cartridge change schedule derived from exposure assessments and OSHA/NIOSH guidance.
Train personnel to recognize breakthrough signs: odor, taste, irritation; and to remove the respirator immediately if detected. Document each cartridge change with date, worker, contaminant, and reason (scheduled or breakthrough).
Maintain replacement stock and revise intervals after process or substance changes.
Chemical Exposure Limits
Although cartridge replacement schedules depend on many variables, you should base them on established chemical exposure limits (CELs) and measured workplace concentrations to ensure respiratory cartridges are changed before breakthrough occurs. You’ll compare manufacturer respirator cartridge service life data against permissible exposure limits and applicable detailing limits for solvents, acids, and aerosols encountered.
Use calibrated sampling pumps and industrial hygiene methods to quantify time-weighted averages and short-term excursion levels. If measured concentrations approach a fraction of the CEL specified in your respiratory protection program, you’ll shorten the cartridge service interval or switch to higher-capacity cartridges. Document calculations, sampling results, and change decisions for compliance audits.
Maintain tightly controlled records so you can defensibly demonstrate cartridges were replaced prior to any unacceptable chemical exposure.
Scheduled Replacement Intervals
Having established how to quantify workplace concentrations and compare them to chemical exposure limits, set a formal cartridge change schedule that prevents breakthrough before exposures reach those limits. You’ll base replacement intervals on measured concentrations, assigned protection factors, cartridge service-life data, and safety factors prescribed by standards.
Document maintenance scheduling, cartridge type, installation date, and calculated change-out date in a compliance log. Train staff to follow the schedule and to tag respirators when cartridges are replaced. Coordinate cartridge replacement with glove storage guidelines and other PPE inventory controls so expired or compromised items aren’t returned to service.
Audit the schedule quarterly and after any process change that alters chemical use. Adjust intervals immediately if monitoring indicates increased airborne contaminants or unexpected breakthrough.
Visual And Physical Checks
Why check cartridges visually and physically before each use? You must perform a visual inspection to confirm cartridges are intact, labeled for the contaminant, and free of cracks, dents, or corrosion.
Physically test seals and threads for tight engagement and absence of play; replace any cartridge that fails tactile checks. You’ll also verify the respirator body, straps, and valve function during this pre-use check.
Never rely solely on scheduled replacement intervals; use condition-based replacement driven by visual inspection and functional checks. Conduct fit testing whenever cartridge type or respirator model changes, and repeat fit testing per your program or regulatory requirement.
Document defects and immediately remove compromised cartridges from service to maintain compliance and user safety.
Recordkeeping And Tracking
A compliant respirator cartridge change schedule requires you to document cartridge type, contaminant target, installation date, service life or breakthrough criteria, and the user’s fit-test record so you can demonstrate timely replacements and traceability. You’ll maintain log entries for each cartridge and respirator assigned to personnel; linking serial numbers to job tasks and exposure assessments.
Use dated entries, signatures, and electronic backups to satisfy auditing. Integrate this schedule with training records and medical surveillance files so you can verify competency and authorization. Define objective replacement triggers: hours of use, contaminant concentration, or manufacturer limits. Review logs at defined intervals; correct deviations and retain records per regulatory retention periods.
Accurate recordkeeping practices minimize compliance risk and protect worker respiratory health.
Emergency Replacement Procedures
The cartridge change schedule you keep for routine replacements should also define emergency replacement procedures so you can respond immediately when breakthrough, damage, or unexpected exposure occurs. You’ll document triggers for immediate cartridge swaps: detected odors, difficulty breathing, visible cartridge damage, and post-exposure incidents.
Establish authorized personnel, location of spares, compatible cartridge types, and required respirator cleaning steps to support rapid exchange. Integrate emergency replacement actions into PPE maintenance logs and incident reports, with timestamps and serial numbers for traceability.
Train staff on recognizing breakthrough and on donning/replacing cartridges under time pressure. Test the procedure during drills and audit compliance quarterly. Maintain stock levels based on usage rates and supplier lead times to prevent gaps in respiratory protection.
Frequently Asked Questions
How Do I Store PPE to Maximize Its Lifespan?
Store PPE properly in cool, dry, dark areas; separate chemicals from gear to maximize lifespan. Clean and dry respirators, and anti fog glasses necessity noted: use approved cleaners and replace cartridges per schedule.
Reuse gloves safely only if reusable nitrile or microfiber and inspected for breaches. Discard disposables. Hang coveralls; keep wheel well protection isolated after heavy contamination. Clean hearing protection between uses.
Log inspections and replacement dates for compliance.
Can I Reuse Disposable Nitrile Gloves Safely?
No, you shouldn’t reuse disposable gloves. You can reuse disposable gloves only if glove integrity is uncompromised and local disposal guidelines permit reuse; this is rare. Inspect for tears, perforations, chemical degradation, and contamination. If any are present, discard immediately.
Follow manufacturer instructions, change gloves between tasks and after chemical exposure, and document disposal per workplace protocols. This ensures compliance and protects against cross-contamination and occupational hazards.
Which PPE Is Best for Wheel-Well Debris Protection?
Use heavy-duty nitrile gloves (9–14 mil) with extended 12-inch cuffs plus Kevlar or mesh arm sleeves for wheel well debris protection. For PPE selection, pair those with safety glasses and a face shield when scraping or pressure-washing.
Wear protective pants or coveralls and slip-resistant footwear. Consider respiratory protection if dust or sprays are present. You’ll minimize cuts, chemical exposure, and splash hazards while meeting compliance and technical safety requirements.
Are Anti-Fog Safety Glasses Necessary for All Tasks?
No, you don’t need anti fog safety glassware for every task. However, you should use it whenever moisture, temperature changes, or prolonged wear will impair vision. You’ll prioritize protective eyewear durability for high-splash, steam, or heat exposures; this is essential for tasks requiring uninterrupted visual precision.
Choose anti-fog lenses for polishing, steam cleaning, or confined spaces. Select impact-rated, scratch-resistant models to meet regulatory and workplace safety standards.
How Often Should Hearing Protection Be Cleaned?
You should clean hearing protection after every use, and perform a formal cleaning weekly as part of your cleaning schedule. Follow manufacturer instructions, use approved disinfectants, and inspect components for wear each cleaning to document PPE storage, condition, and lifespan maximization.
Replace foam plugs daily or when soiled. Earmuff cushions and headbands need routine deep cleaning and recorded checks. Maintain controlled storage to prevent contamination and extend service life.
Conclusion
You’ve seen the charts and schedules; now apply them consistently. Fit PPE to each employee, follow glove chemical-resistance ratings, and change respirator cartridges per the specified schedule or when indicators trigger.
Adhere to exposure limits, perform scheduled replacements, and do visual and physical checks before each use. Keep precise records and have emergency replacement procedures ready. Doing this ensures compliance, minimizes chemical exposure, and maintains operational readiness in your detailing operation.