Car Detailing Process Steps
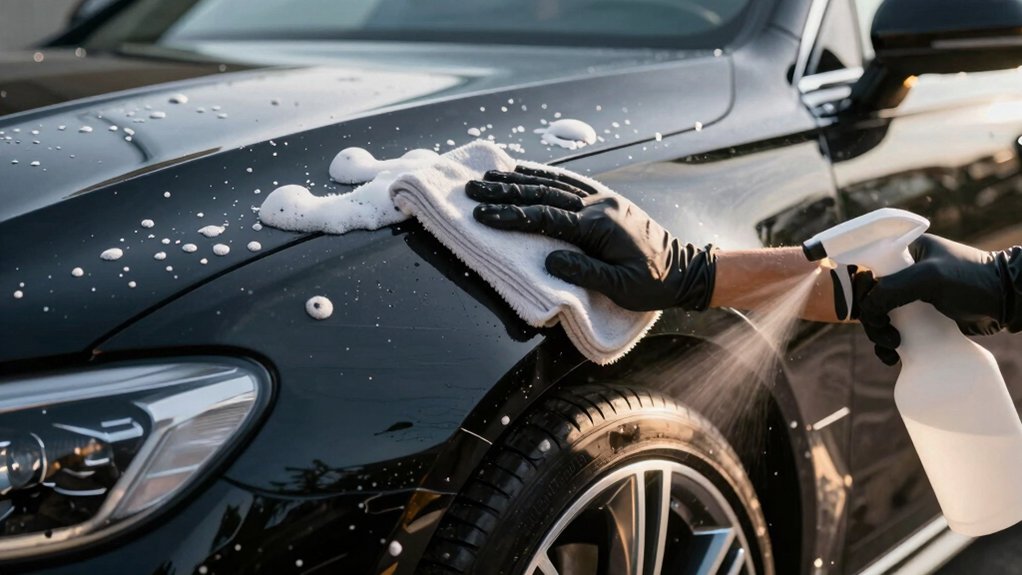
You’ll start with a two-bucket, pH-balanced wash to remove surface grime and test for bonded water spots. Then escalate: chemical spot remover for light deposits, light polish for etches, and compounding only for deep damage. Measure clearcoat hardness per panel to pick abrasives and note repaired zones. Verify cleaner pH (strips or meter), adjust dilutions, and protect trim and glass.
Follow rinse and neutralize steps; then seal. Continue for full protocol and techniques.
Quick Overview
- Start with a pH-verified two-bucket wash to remove surface dirt and protect wax or coatings.
- Decontaminate paint (iron fallout and tar). Then, perform a pH-balanced rinse and dry.
- Assess clearcoat hardness per panel to select appropriate abrasive aggressiveness and polish steps.
- Escalate correction: chemical spot removers → light polish → compound/rotary only for deep etches.
- Finish with panel-specific sealing or coating and record pH, hardness, and products used for future maintenance.
Water Spot Removal Times
When you spot mineral rings or etched marks on paint, pick the least aggressive fix that will work and escalate only as needed: Start with a pH-balanced wash for surface deposits. Move to a chemical spot remover for light bonded spots. Then use light polishing for etched imprints, and reserve heavy compounding or rotary work for deep etches. You’ll follow an escalation rule: wash → chemical → polish → compound.
Prioritize time savings by testing quick methods first. Track etch depth before choosing tools. Use methodical passes and note results.
| Type | Method | Time |
|---|---|---|
| Surface | pH wash | 5–15 min |
| Light bond | Acid remover | 1–5 min |
| Etched | Light polish | 10–30 min |
Paint Hardness Checklist
A simple hardness test helps you choose the right correction and protection steps for a given panel: use a Mohs-style pick or pencil to gauge clearcoat resistance, note variations across panels and repairs, and record hardness values before compounding or sealing so you can match abrasives and sealants to the paint’s tolerance. You’ll test systematically, compare readings, and flag soft or repaired areas that need gentler cuts or different protection.
- Document hardness per panel to guide abrasive choice and pad selection.
- Note repaired zones separately; repaired paint often shows lower hardness.
- Adjust polish aggressiveness and sealant selection to reduce detailing risks.
Follow your notes during correction to avoid overcutting. Ensure durable protection.
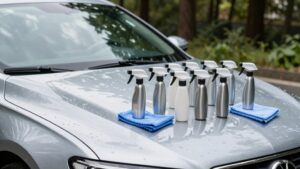
Surface Prep pH Levels
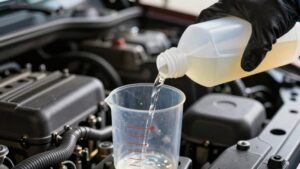
Before you start prep, verify the pH of every cleaner you’ll use so you know where it sits on the 0–14 scale and whether it’s acidic or alkaline. Test products with pH strips or a handheld meter. Stick to the safe ranges specified for paint, glass, trim, and wheels to avoid etching or stripping protective layers.
Track pH and contact time as you work; adjust dilution to protect surfaces while still removing contaminants.
Understanding pH Scale
Why does pH matter for surface prep? You need predictable chemistry to avoid harming paint, trim, or protective layers. The pH scale (0–14) tells you whether a product is acidic, neutral, or alkaline; you’ll pick cleaners accordingly. Measure with strips or a meter, record readings, and rinse promptly if values exceed safe ranges.
Neutral pH shampoos and pre-wash solutions minimize strip-off of wax effects and sealants. Strong alkalines remove heavy grease but demand caution around trim and glass. Acids tackle mineral deposits and rust; however, you’ll use them sparingly and protect surrounding areas with proper tarp coverage.
Work methodically: test a small area, dilute to label guidance, rinse, then proceed with the two-bucket wash.
Acidic Versus Alkaline
How should you choose between acidic and alkaline cleaners for surface prep? You evaluate soil type and substrate. Acidic solutions remove mineral deposits, water spots, and oxidation; alkaline solutions dissolve oils, greases, and organic buildup.
Balance cleaning power with material safety. Strong acids can etch clear coat and alloy; strong alkalines can dull trim and strip wax. Consider dilution, dwell time, and agitation to control pH impact on finishes. Test a small area when uncertain, rinse thoroughly, and neutralize residues as part of your workflow.
For routine exterior washing, you’ll favor pH-balanced shampoos. For targeted correction, you’ll select acidic vs alkaline products specifically formulated for wheels, glass, or engine bays, following manufacturer guidance and protective measures.
pH Testing Methods
Assessing the pH of cleaning solutions and rinses helps you match product chemistry to the surface and soil described previously. Use test strips or a digital pH meter: calibrate the meter, rinse probe between samples, and dip into a fresh aliquot of solution.
Test concentrates, working dilutions, and final rinse water to confirm expected values. Record results and note water quality, since hard or chlorinated water can skew readings and alter dilution efficacy.
Compare measured pH against product guidance to prevent etching or coating lift. For coated vehicles, verify coating compatibility by testing a small, inconspicuous area with the prepared wash and rinse. Adjust product choice or dilution until readings and spot tests show no adverse reaction.
Safe pH Ranges
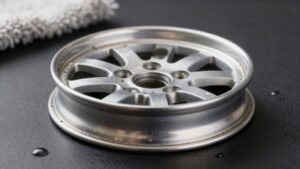
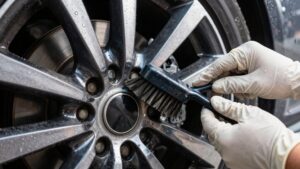
pH balance matters when you’re preparing surfaces, so aim for cleaners and rinses that fall within safe ranges to avoid etching, stripping coatings, or leaving residues. You should target near-neutral products: pH 6–8 for general paint and trim cleaning; pH 9–10 for safe alkaline wheel and tire cleaners; and pH 3–5 for targeted acid-based iron removers used briefly and rinsed thoroughly.
Test product pH before use and neutralize when required. Consider water dynamics: hard water can raise effective alkalinity and affect rinsing, so adjust dilution or use deionized rinse water. Mark out incompatible zones and follow dwell times precisely. If a product’s pH is extreme or unclear, treat as “subtopic not relevant” and choose a verified alternative.
pH Effects On Surfaces
When you prep a surface, remember that the solution’s acidity or alkalinity directly changes how cleaners interact with paint, trim, glass, and coatings. Too alkaline, and you risk stripping waxes or degrading sealants; too acidic, and you can etch clearcoat or damage chrome. You test pH before use, document readings, and choose agents matched to the substrate: neutral pH for fresh sealants, mildly alkaline for heavy oil and road film, and mildly acidic for mineral deposits.
You spot-check trim and chrome first. Watch for invisible effects like altered color matching on plastics and finishes. Strong chemistries can shift pigments or dull factory coatings. Note scent impact only as an operator comfort factor; don’t let fragrance mask chemical strength. Record results for repeatable, safe prep.
Adjusting Product pH
Before you adjust any product, test its pH and the substrate so you know the baseline chemistry you’re changing. Measure pre wax pH after cleansing and clay to confirm the surface is within the safe range for your sealant or wax. Use calibrated strips or a digital meter; record values and environmental conditions.
If product pH needs correction, add neutralizing agents incrementally, mixing thoroughly and retesting until you reach target. For strong alkaline or acidic residues, perform controlled rinses and buffer solutions rather than over-diluting detailing products. Verify post wash pH before applying protective coatings to ensure adhesion and longevity.
Document adjustments and results so you reproduce successful settings on similar finishes and conditions.
Frequently Asked Questions
How Long Does Full Interior Detailing Typically Take?
A full interior detailing typically takes between 2 and 6 hours, depending on vehicle size and condition. You’ll methodically vacuum, shampoo carpets, clean vents and hard surfaces, treat leather, and detail crevices.
Lightly soiled compacts finish closer to 2 hours. Heavily stained SUVs or neglected cars push toward 5 to 6 hours. Your detailing duration also varies with product dwell times and drying needs; plan accordingly for thorough, hands-on results.
Which Products Are Safe on Aftermarket Matte Finishes?
Use pH-neutral, non-abrasive cleaners and matte-specific sealants that are labeled Safe for matte finishes and formulated for Aftermarket coatings. You’ll avoid waxes, polishes, or glazes that add gloss. Instead, pick gentle matte shampoos, rinse-free waterless sprays marked safe for matte, and silicone-free protectants.
Test any product on a hidden area; apply with soft microfiber, and follow manufacturer cure times. You’ll maintain texture while protecting the coating.
Can Ceramic Coatings Be Applied Over Existing Wax?
Yes, but you shouldn’t leave wax on when you apply ceramic coatings. You’ll strip existing wax thoroughly with an appropriate surface cleanser or IPA wipe to ensure wax compatibility and proper bonding.
After clay, paint correction, and final cleanse, inspect for residue. Then apply the ceramic coating per product directions. If any wax remains, the coating won’t bond correctly; this reduces longevity and hydrophobic performance.
How Often Should Leather Be Conditioned for Longevity?
You should condition leather every 3–6 months to preserve appearance and durability. For high-use seats or harsh climates, do it quarterly; for low-use, every six months.
Focus on leather conditioning; address longevity factors like UV exposure, humidity, dirt, and wear. Clean first with a compatible cleaner, test a hidden area, apply conditioner evenly with a microfiber, let it absorb, then buff lightly.
Keep records of treatments for consistency.
Do You Offer Mobile Detailing Services?
Yes, you’ll get mobile detailing at your location. You can choose service area coverage options that match your neighborhood or workplace, and we’ll confirm scheduling availability during booking.
You’ll see a methodical, hands-on approach: technicians arrive with full equipment, follow a precise checklist, and complete exterior, paint, and interior care on-site. You’ll receive clear start and end times, a service summary, and easy rescheduling if needed.
Conclusion
You’ve got the tests and times you need to get surfaces right: remove water spots promptly, check paint hardness, and prep with the correct pH. Use reliable testing methods, read the pH scale, and know acidic versus alkaline effects so you don’t damage clearcoat or trim.
Stay within safe pH ranges; adjust product pH when necessary, and document readings. Follow these steps methodically, and you’ll protect finishes while delivering consistent, professional results.