Compound Vs Polish Difference
You’ll use a compound when you need fast defect removal and aggressive cutting. It strips oxidation, sanding marks, and deeper scratches to quickly flatten and level the clear.
You’ll use a polish when you want to refine and restore gloss. It removes light haze and micro-marring to produce a mirror finish without removing much clear coat.
Choose compounds for correction; polishes for finishing. Follow with verification and aftercare to lock in results if you want more detail.
Quick Overview
- Compound aggressively removes clear coat defects with coarser abrasives and leaves light scratches needing refinement.
- Polish uses finer abrasives to refine sanding marks and restore gloss toward a mirror finish.
- Use compound first for heavy defects; then progressively finer polishes for clarity and hologram removal.
- Compounds sacrifice more clear coat; polishes minimize material removal and enhance depth and shine.
- Proper decontamination and verification are required before compounding or polishing for best, long-lasting results.
Abrasive Grit Comparison Chart
Think of abrasive grit as the roadmap from coarse correction to showroom shine: lower grit numbers (larger particles) cut fast and remove damaged clear coat, while higher grit or lower-micron abrasives refine the surface toward a mirror finish. You will plan a grit transition that respects abrasive compatibility with clear coats and compound/polish chemistry.
Start with coarser cuts for defects and step progressively finer to avoid excess removal. Use the chart to match micron or grit targets to outcomes and choose compounds whose abrasives align with pad selection and application speed. Below is a concise reference to guide choices and sequence for predictable, reproducible results.
| Grit/Micron | Typical Result |
|---|---|
| P80 / 200µ+ | Rapid cut |
| P180–P240 | Flatting |
| 10–63µ | Finish prep |
| 10µ (1500–2000) | Final polish |
| 0.05–0.3µ | Mirror finish |
0–3000 Grit Guide
000 grit occupies the extreme coarse end of abrasive options, and you should use it only for severe clear coat failure, heavy oxidation, or paint leveling where rapid material removal is required. You’ll rely on 000 grit for dramatic correction; however, you must confirm abrasive compatibility with the paint system and follow with refinement to preserve polish longevity.
Use measured pressure, short passes, and inspect frequently to avoid through-cutting.
- Use only on severely compromised panels with known clear coat depth.
- Pair with compatible backing pads and machines for controlled removal.
- Flush debris and re-evaluate frequently to prevent substrate exposure.
- Follow immediately with progressive finer grits and a finishing polish.
- Limit frequency; aggressive cuts reduce long-term polish longevity and material integrity.
Surface Contamination Removal
Before you choose a compound or polish, identify surface contaminants: tar, brake dust, bonded fallout, tree sap, and embedded iron. Assess how strongly they’re bonded to the clear coat.
Use visual inspection, the fingertip drag test, and quick clay or iron-removal sprays to detect and gauge contamination so you pick the safest removal method. After cleaning with the appropriate chemical or clay and the correct pads, verify with another fingertip test and a quick polish pass to ensure the surface is fully decontaminated and ready for correction.
Surface Contaminant Types
What contaminants are clinging to your paint, and how stubborn are they? You’ll encounter loose particles like dust and pollen, removable with washing. You’ll also find tenacious residues: tar, brake dust, and tree sap that resist simple cleaning. Industrial fallout and embedded metals demand targeted decontamination to prevent staining.
Acid rain etching and bird droppings chemically alter clear coat and call for prompt action. You’ll also face organic films and road grime that reduce gloss. Understanding contamination bonding helps you choose products: light wash, clay bar, iron remover, or aggressive decontaminants. Match the tool to the contaminant to avoid needless clear coat removal.
Be methodical: test a small area, confirm results, then proceed so your correction steps (compound or polish) start from a truly clean surface.
Contaminant Bond Strength
How tightly a contaminant bonds to your paint determines the tools and steps you’ll need to remove it, so start by evaluating adhesion before you reach for aggressive correction. You’ll judge contaminant bond strength to choose between simple wash, clay, or heavier mechanical action. Lightly bonded deposits lift with soap and agitation. Moderate surface adhesion responds to clay bars or chemical decontaminants. Stubborn, chemically bonded residues may need specialized removers or controlled polishing.
Match product aggressiveness to bond strength to avoid unnecessary clear coat loss. Use lubricants with clay to minimize marring, and test a small area to confirm removal without cutting. Your goal is predictable removal with minimal paint removal, preserving gloss and avoiding overuse of compounds.
Detection And Inspection
You’ve already assessed how tightly contaminants bond to the paint. Now inspect the surface methodically to locate and classify what’s left. Use consistent lighting and feel panels by hand to find embedded fallout, tar, or bonded iron. Note any detection mismatch between visual cues and tactile evidence; shine can hide grit. Record locations and severity so you choose the right product strength later.
Plan inspection timing to minimize false negatives: inspect after a controlled wash and when the surface is cool to touch. Use clay or a quick-detail spray on test spots to confirm bonded contamination without aggressive action. Your goal is a clear map of contamination that guides compound versus polish decisions while avoiding unnecessary material removal.
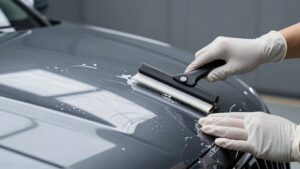
Safe Removal Techniques
Want a clean, defect-free surface without risking the clear coat? You’ll remove surface contamination methodically: clay bar for embedded particles, iron fallout remover for rail dust, and a gentle degreaser for oils. Work small panels, use proper lubricants, and inspect with bright light so you’re not treating a subtopic mismatch or using an irrelevant pair of products.
Choose the least aggressive option that achieves results; don’t jump to cutting compounds. Use soft microfiber towels, clean pads, and controlled pressure with a dual-action polisher when mechanical help’s needed. Rinse and dry thoroughly between steps to avoid recontamination.
These steps preserve paint thickness, reduce the need for heavy cutting, and deliver a safe, consistent foundation for polishing.
Post-Cleaning Verification
Once you’ve finished cleaning, verify the surface is truly contaminant-free before moving to compounding or polishing. Any remaining iron, tar, or embedded particles will scratch during correction. Use a strong light and a safe clay bar or chemical decontaminant to feel and reveal impurities. Drag tests and Isopropyl wipe checks confirm removal.
If you detect contaminants, repeat targeted decontamination until the surface is uniformly smooth. Document the result and note environmental variables that affected the process. Then, plan your next steps based on paint condition.
After correcting and polishing, include contaminant checks in your aftercare routine and advise clients on ideal store conditions to prevent rapid recontamination. Accurate verification prevents rework and preserves finish integrity.
Frequently Asked Questions
How Often Should I Compound Versus Polish My Car Annually?
You should compound 0–2 times yearly and polish 3–6 times as part of regular seasonal care. How often depends on paint condition, warranty impact, repairability concerns, and matte finishes: avoid aggressive compounds on matte.
Use correct pad types for bumper scuffs, paint transfer, or deeper defects. Your car care routine balances polish vs compound differences: compound for heavy correction, polish for upkeep frequency and glossy, long-lasting results.
Can Compounding Void My Vehicle’s Paint Warranty?
Yes, compounding can void your paint warranty if it’s done improperly or alters factory finishes. You should check manufacturer terms and use approved products and technicians to avoid warranty impact.
Keep records of professional services and avoid over-cutting; manufacturers often cite improper aftermarket correction as cause for denial. When in doubt, get written approval from the dealer before aggressive paint correction to protect your compounding warranty.
Will Compounding Remove Paint Transfer or Bumper Scuffs?
Yes, compounding can remove many paint transfer marks and lighten bumper scuffs if the damage is surface-level. You’ll use an abrasive compound to cut through the transferred paint and smooth the clear coat. Then, follow with polish for shine.
Deeper gouges or missing paint won’t be fixed by compounding and may need touch-up or repainting. Test a small area first, and don’t overdo it to avoid thinning the clear coat.
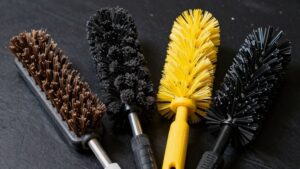
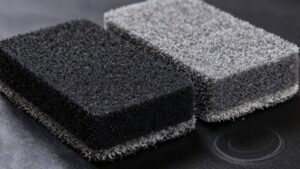
Which Pad Types Pair Best With Compound and Polish?
Use firm wool or aggressive foam pads for compound; they deliver pad selection that maximizes compound compatibility and cutting power to remove heavy defects.
For polish, choose soft cutting or finishing foam and microfiber pads to refine gloss without overcutting. You’ll match pad density and face texture to machine speed and paint hardness. Test small areas, and progress from aggressive to fine pads to ensure efficient correction and showroom-quality results.
Can I Use Compound or Polish on Matte Finishes?
You shouldn’t use compound on matte finishes because compound wear will remove the flat texture and gloss control. You can use a matte-specific polish instead. You’ll get safer cosmetic correction with products designed for matte surfaces. Additionally, polish duration is shorter between treatments when you maintain matte safely.
Use soft foam pads, test a small area, and avoid aggressive cutting to preserve the intended finish. This will help you avoid glossy blotches.
Conclusion
You’ve learned how compounds and polishes differ by grit, purpose and technique, so choose materials that match the surface and contamination level. Use coarser compounds (lower grit) to remove heavy defects and bonded contaminants. Then switch to finer polishes (higher grit) to refine gloss and remove micro-scratches.
Inspect under proper lighting, remove residues safely, and verify results with touch and gloss checks. Follow this sequence to get consistent, professional finishes every time.