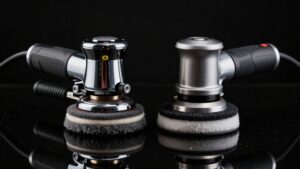
Dual Action Polisher Backing Plate Sizes Reference
Choose 3″, 5″, or 6″ backing plates to match panel size and access. 6″ pairs with 6.5″ pads for full panels and best orbital transfer; 5″ is the general-purpose option, and 3″ handles tight spots and details. Match pad diameter within ±5mm. Keep 2–8mm edge overhang and ensure full hook-and-loop contact.
Use the correct 5/16″ x 24 thread, torque per maker spec (or ~80–120 in‑lb), and recheck after break‑in. More specifics follow.
Quick Overview
- Common backing plate diameters: 3″, 5″, and 6″ to match 3″, 5″, and 6.5″ pads for detail, general, and full-panel work.
- Match pad diameter to plate within ±5 mm to prevent edge lift and ensure secure hook-and-loop engagement.
- Maintain 2–8 mm pad overhang off the plate edge to protect paint without causing pad collapse.
- Use manufacturer torque specs; typical DA guidance is 80–120 in-lb / 9–14 N·m. Hand-start, then finish with a torque wrench.
- Use correct thread, which is commonly 5/16″ x 24 for DA. Avoid impact guns, and recheck torque after initial break-in.
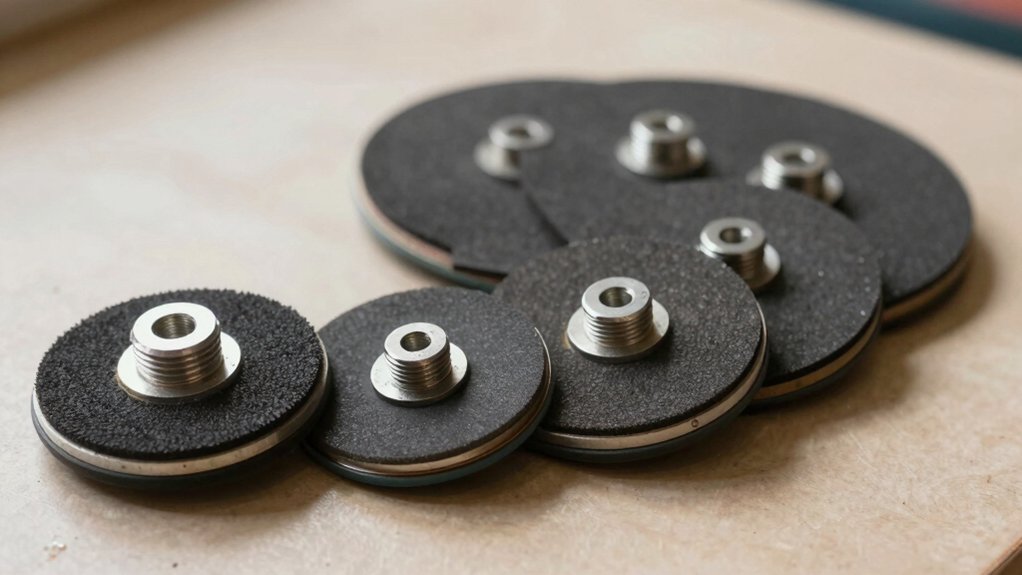
Backing Plate Diameter Chart
The Backing Plate Diameter Chart gives you a quick reference to match plate size with pad diameter, typical polisher models, thread type, and operating limits so you can pick the right plate for each task. You use larger plates (6″) for full coverage and better orbital motion transfer. Mid-sizes (5″) balance edge geometry safety and polishing efficiency. Small plates (2–4″) let you reach tight areas without disturbing surrounding surfaces.
Choose a plate to preserve pad adhesion and prevent edge caving. Check thread compatibility, as most use 5/16″ male threads, and max OPM ratings for your machine. This chart helps you match coverage, compression, and pad size so you maintain consistent pressure and avoid paint contact or swirl creation.
| Plate | Pad | Use |
|---|---|---|
| 6″ | 6.5″ | Full panels |
| 5″ | 5″ | General |
| 3″ | 3″ | Detail |
Pad-To-Plate Fit Tolerances
When you move from choosing plate diameter to pad-to-plate fit tolerances, you need to check how pad diameter, hook-and-loop attachment, and edge overhang work together to prevent paint contact and pad deformation. You’ll verify that pad safety margins keep the plate edge recessed from painted surfaces; this ensures that heat resistance of materials prevents bond failure under load. Measure overlap so the pad covers the plate face without excessive overhang that folds under pressure.
- Match pad diameter to plate within ±5mm to avoid edge lift or bare plate exposure.
- Ensure hook-and-loop engagement fully contacts the plate’s fastening area for secure bonding.
- Maintain 2–8mm edge overhang for paint protection without pad collapse.
- Confirm material heat resistance ratings meet your operating OPM/RPM.
Torque Specs for Mounting
When you mount a backing plate, torque the mounting bolt to the manufacturer’s spec and confirm the 5/16″ x 24 thread matches the spindle to prevent cross-threading. Use a calibrated torque wrench and follow a simple torque chart (by plate diameter and machine RPM) to ensure a secure, balanced fit without overloading the insert.
Also, check pad-to-plate fit after torquing so the pad seats evenly and won’t shift during operation.
Mounting Bolt Torque
Why care about mounting bolt torque? You need correct mounting bolt tension to secure the backing plate without stressing threads or deforming the urethane. Tighten to the manufacturer’s torque limits when specified; over-torquing can strip the 5/16″ spindle or compress inserts. Under-torquing allows wobble and vibration.
Use a calibrated torque wrench and tighten in one controlled pass after hand-starting the bolt. Don’t rely on impact guns for final seating. If torque specs aren’t provided, aim for a moderate, repeatable clamp—firm, not crushing. Then verify balance at low speed before full use. Recheck torque after the first few minutes of operation and periodically thereafter. Proper torque preserves thread life, balance, and safe polishing performance.
Thread Size Matching
How tight should you set the mounting bolt on a 5/16″ x 24 DA backing plate? You’ll torque it to snug specs that ensure thread compatibility without stressing the steel insert or urethane body. Use the manufacturer’s recommended range: typically moderate hand-tight plus a controlled fraction of a turn to secure the plate while preserving material durability.
Over-torquing can strip threads or compress the insert. Under-torquing risks loosening during use. Check that the male 5/16″ x 24 spindle seats fully and that the backing plate’s inner steel insert engages cleanly. If you swap brands, confirm thread compatibility first.
Inspect threads and insert for wear regularly. Replace the plate if you see deformation or compromised material durability.
Torque Wrench Use
After you snug the 5/16″ x 24 backing plate by hand, use a torque wrench to finish tightening to a controlled spec so you don’t overstress the steel insert or urethane body. You should set the torque wrench to a moderate value recommended by your polisher maker or around 10–15 ft‑lb for common DA spindles. Avoid excessive force that can deform the steel insert or crush the urethane.
Tighten smoothly, check for runout, then re-torque after a short break-in run. Inspect mounting hardware for thread damage and clean mating surfaces before reassembly. If you swap backing plates frequently, mark torque on your maintenance log and verify torque periodically. Consistent, repeatable clamping protects balance, prevents pad wobble, and extends plate life.
Torque Specs Chart
Want consistent, repeatable clamping when you mount your 5/16″ x 24 backing plate? Use a simple torque specs chart to set mounting bolt torque precisely. For most DA polishers with a 5/16″ x 24 thread and steel insert, tighten the mounting bolt to the manufacturer’s recommended range: typically 80–120 in-lb (9–14 N·m). If your machine manual specifies different values, follow that.
Always use a calibrated torque wrench, clean threads, and apply light thread lubricant only if specified; do not over-torque. Record the chosen value for future consistency and recheck after initial use. Correct mounting bolt torque prevents thread damage, maintains balance, and ensures safe, repeatable pad retention during polishing.
Pad Backing Plate Fit
Why does correct backing plate fit and mounting torque matter? You’ll get consistent pad contact, predictable finish, and improved pad durability when the plate seats squarely on the spindle and you apply the specified torque. Use the manufacturer’s torque spec for your 5/16″ x 24 spindle to avoid loosening or unwanted play during operation.
Tighten firmly but not excessively so threaded steel inserts aren’t stressed. Check hook-and-loop engagement and center alignment before each run. Proper fit reduces heat buildup and pad deformation, extending service life and helping cloth care routines stay effective by preventing premature contamination.
Inspect mounts for wear; replace damaged plates; and torque to spec after any pad change to maintain safe, repeatable polishing results.
Preventing Over-Tightening
How tightly should you mount a backing plate to avoid damage? You should tighten just enough to secure the plate without deforming the urethane or stressing the steel insert. Use manufacturer torque specs when available; typical DA polishers accept moderate hand-tight plus a 1/8–1/4 turn with a wrench. That prevents torque over-application that can crush foam or strip threads.
Check for mounting looseness by spinning the polisher by hand before power-up. If you feel play, add small increments of torque until snug. Avoid hammering fasteners or using impact tools. Re-inspect threads and steel inserts for wear after repeated installations. Properly set torque prevents torque-related failures, maintains balance, and reduces risk of pad detachment and paint damage.
Frequently Asked Questions
Can I Use Different Pad Materials on the Same Backing Plate?
Yes, you can use different pad materials on the same backing plate, but check pad material compatibility concerns first. You’ll want pads with matching hook-and-loop diameter and thickness to avoid edge caving and imbalance.
Ensure the plate’s speed/OPM rating and center reinforcement suit the pad’s stiffness. Softer foam, wool, or microfiber pads work if they fit securely. Otherwise, change plates or pads to prevent damage and uneven polishing.
How Do Backing Plates Affect Polish Heat Buildup?
Backing plates affect polish heat buildup by changing pressure distribution and heat dissipation effects: You’ll see smaller plates concentrate heat faster; larger plates spread load and reduce hotspots.
Backing plate compatibility with pad size and material also alters airflow and thermal transfer. You’ll want correct matching to avoid burning clear coat. Use thicker, ventilated pads and proper speed to manage temperature and prolong polish and paint life.
Are Backing Plates Compatible With Random Orbital Sanders?
Yes, backing plates can be compatible with random orbital sanders if they meet the sander’s compatibility requirements. Check thread size (usually 5/16″-24 for DA tools), center spindle diameter, and plate diameter before fitting.
Use proper backing plates and pads matched to your sander to avoid imbalance. For maintenance tips, regularly inspect the Velcro surface, clean debris, and tighten threaded inserts to extend plate life and ensure safe operation.
What Cleaning Methods Prolong Backing Plate Life?
You should clean backing plates after each use: remove pads, knock off debris, and blow out dust with compressed air. Wipe urethane and steel inserts with a mild detergent solution, rinse, and dry thoroughly to prevent corrosion.
Inspect Velcro and replace worn pad materials to avoid uneven wear. Store plates flat in a cool, dry place away from solvents and UV to prolong life and maintain balance and performance.
Can I Modify a Backing Plate for Custom Fit?
Yes, you can modify a backing plate for a custom fit, but do it carefully. You’ll want to match pad materials, thickness, and Velcro alignment so the pad sits flush and won’t stress the polisher.
Trim edges sparingly; reinforce threaded inserts; and avoid altering core balance. Test at low speed, then increase RPM. Improper mods can cause wobble, paint damage, or fastener failure, so proceed cautiously and use quality materials.
Conclusion
You’ve got the right plate size, fit tolerance, and torque specs to keep your dual-action polisher performing reliably. Match thread sizes, use the correct mounting bolts, and torque them with a calibrated wrench to the chart values to avoid loosening or damaging parts.
Check pad-to-plate fit before use, and don’t over-tighten; snug to spec is enough. Follow these steps every time, and you’ll maintain safe, consistent results and longer tool life.