Engine Bay Cleaning Checklist
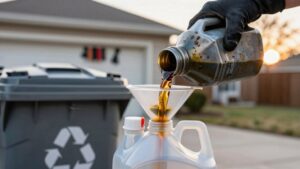
Before you start, let the engine cool for at least 30 minutes and verify surfaces are cool to the touch. Remove and bag the oil cap and dipstick to vent pressure and avoid accidental replacement.
Use low-pressure misting (≤1000 psi), warm ambient air, and compressed air to dry; never blast with high-pressure washers that can force water into sensors, connectors, and seals. Mask electricals and seams with plastic and tape, towel-dry visible areas, and let everything fully air-dry.
Continue for detailed steps and protections.
Quick Overview
- Ensure the engine is fully cool (30+ minutes) and surfaces are cool to touch before any cleaning.
- Vent oil system by removing and safely storing the oil cap and dipstick to avoid pressure buildup.
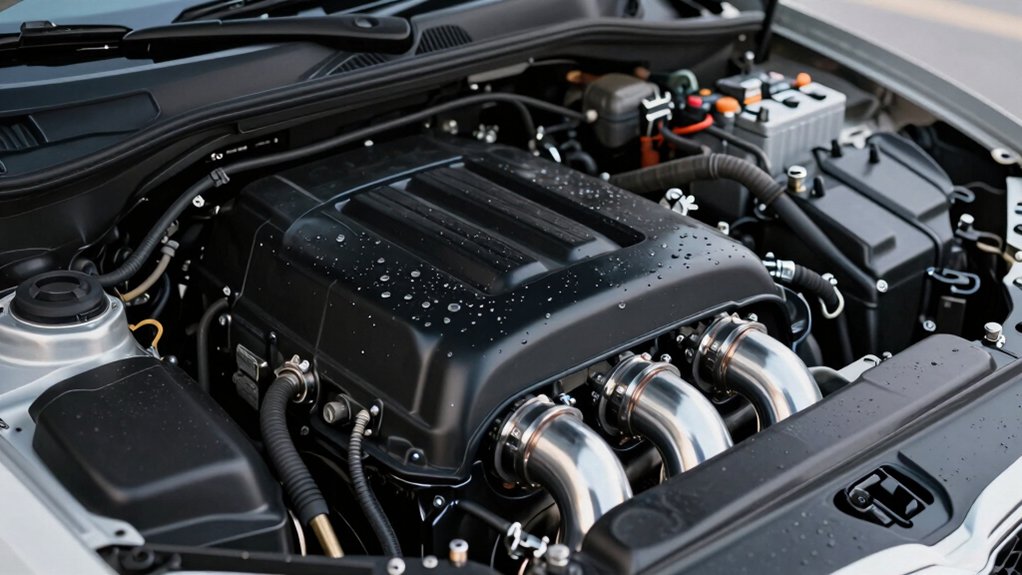
- Mask and cover alternator, fuse box, coils, and exposed connectors with plastic and tape before spraying.
- Use low-pressure water (≤1000 psi), gentle misting, and rinse top-to-bottom from at least one foot away.
- Dry immediately with compressed air and microfiber towels. Inspect gaskets/seals; then allow complete air drying before restart.
Recommended Cleaning Temperatures
Why clean only when the engine’s cool? You’ll prevent thermal shock, ensure degreaser dwell, and avoid rapid evaporation that reduces effectiveness. Work methodically: wait 30+ minutes, verify surfaces are cool to touch, and choose ambient conditions that favor air drying.
| Parameter | Spec | Rationale |
|---|---|---|
| Engine State | Cool (30+ min) | Prevents warping; enables dwell |
| Water Pressure | Low (≤1000 psi) | Minimizes electrical intrusion |
| Ambient | Warm, low humidity | Optimizes drying methods |
Don’t use cold water on a hot block; that risks cracks and color mode corrosion of coated parts. Use gentle mist rinses, compressed air to remove residue, then microfiber towels and open-hood air drying. Secure covers on electrics before any spray.
Oil Cap & Dipstick Reminder
Before you start spraying or rinsing, remove the oil cap and pull the dipstick to vent trapped pressure and prevent contaminated water from entering the fill tube or oil pan. Then secure both in a clean, dry place or loosely re-seat the cap if recommended by the vehicle manufacturer. You’ll wear gloves and goggles; work methodically; and treat the oil fill area as a contamination control zone.
Verify seals and surrounding surfaces for cracks or buildup before cleaning adjacent areas. When replacing the dipstick, confirm oil level and seating. Torque or hand-tighten the oil cap per spec.
- Mark or bag the oil cap and dipstick to avoid accidental replacement during washing.
- Inspect seal condition and replace if brittle or cracked.
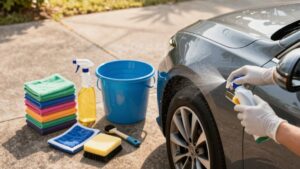
- Keep rags and absorbent pads on hand.
- Avoid direct water stream on exposed openings.
- Note manufacturer-specific re-seating instructions.
Avoid High-Pressure Washers
Don’t use high-pressure washers on the engine bay, because the force can damage seals, gaskets, and delicate electrical housings. High-pressure spray can force moisture into connectors and sensors; this increases the risk of corrosion and malfunction.
Use low-pressure rinsing, misting techniques, or compressed air to control water and protect vulnerable components.
High-Pressure Damage Risks
How forcefully you spray water matters: high-pressure washers can drive water into electrical connectors, sensors, and bearings, causing shorts, corrosion, or mechanical failure. You should avoid high pressure cleaning around sealed components and delicate fasteners. High pressure sprays create force vectors that displace seals, remove lubrication, and force contaminants into tolerances you can’t inspect visually.
Limit water exposure by using a wide-fan, low-pressure setting or a garden hose with gentle flow. When rinsing, work top-to-bottom and maintain at least a foot distance from vulnerable areas. If you must use a pressure washer, select the lowest nozzle pressure; angle the spray to deflect rather than impact. Immediately dry exposed areas with compressed air and microfiber towels to prevent trapped moisture.
Electrical Component Concerns
High-pressure sprays pose a direct risk to electrical components in the engine bay; they can force water past seals and gaskets into connectors, sensors, and motor housings, causing short circuits and accelerated corrosion. You should never target the alternator, fuse panel, coil pack, or exposed harnesses with pressurized streams.
If the engine is still hot, wait until it cools. Directing water at a hot engine can vaporize contaminants and drive moisture into tiny crevices. Use dry cleaning methods first: compressed air and soft brushes to remove loose debris.
When you need liquid cleaning, apply low-pressure misting and keep electrical areas masked with plastic and tape. After rinsing, employ compressed air and microfiber towels for immediate drying to prevent latent corrosion.
Seal And Gasket Vulnerability
Why would you risk forcing water past seals and gaskets with a powerful washer? You shouldn’t. High-pressure sprays create seal vulnerability by driving water and contaminants into mating surfaces, compressible seals, and aged rubber.
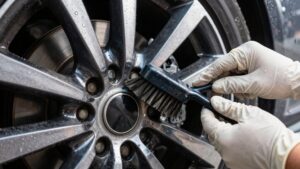
Inspect seals and gaskets visually before cleaning; note cracks, hardening, or displaced material. Protect vulnerable joints by covering them with plastic and secure tape. Direct rinsing with a wide, low-pressure fan is advisable. Use misting or gentle hose settings when working near valve covers, intake boots, and axle seals.
After cleaning, verify gasket protection by drying seams with compressed air and checking for leaks. Document any compromised seals for repair; preventing water ingress preserves component integrity and avoids unnecessary gasket replacement costs.
Forced Moisture Penetration
When you blast the engine bay with a powerful washer, you force water into seals, electrical connections, and porous surfaces; this risks short circuits and accelerated seal failure. Use low-pressure fan sprays or misting instead and always shield vulnerable joints before any rinsing.
You must control moisture risk by limiting spray pressure, directing flow away from connectors, and keeping dwell times minimal. Cover the alternator, fuse panel, and coil pack with sealed plastic; secure with tape. Use fan spray and maintain engine bay ventilation to promote rapid evaporation. After rinsing, deploy compressed air from multiple angles to displace trapped water. Then towel-dry and leave the hood open.
Document locations of protective covers for future cleanings to prevent repeat exposure.
Sensor Malfunction Potential
How can a powerful washer affect your engine sensors? You can force water and debris into sensor housings, connectors, and harness seals, creating short circuits, corrosion, or intermittent signals. Recognize sensor risks by identifying exposed MAP, MAF, O2, and temperature sensors before cleaning.
Don’t aim a concentrated spray at electrical connectors or sealed modules; pressure can dislodge seals and drive contaminants deeper.
Prioritize wiring safety: cover harnesses and connectors with plastic and tape, and avoid soaking junctions. After any wetting event, dry connectors with compressed air and inspect insulation for swelling or cracking. If you detect fault codes or erratic behavior after cleaning, isolate affected sensors and perform continuity and resistance checks. Replace compromised seals or components to restore reliable sensor function.
Safer Low-Pressure Alternatives
A low-pressure approach reduces the risk of driving water and debris into sensors, connectors, and seals. So, use a garden hose with a wide-fan nozzle or a pressure washer set to its lowest safe setting (typically under 500 psi) and maintain several feet of distance while rinsing.
You should pre-cover sensitive modules and electrical connectors. Then, remove loose debris with compressed air. Use targeted low-pressure rinses from top-down and a soft brush for agitation; avoid aiming at seals, harness entry points, or the alternator.
Limit solvent use to manufacturer-approved degreasers and avoid open flames. Gasoline vapors can ignite when solvents are present.
After rinsing, blow out water with compressed air, towel dry, and allow complete air drying before removing covers and restarting the engine.
Frequently Asked Questions
Can I Start the Engine Immediately After Cleaning?
No: you shouldn’t start the engine immediately after cleaning. Starting the engine is only advisable once electrical components and visible moisture are fully dry to avoid shorts or corrosion.
Aftercare timing is important; wait until compressed air and towels have removed surface water, the hood is left open for air drying, and protectant is applied. This typically takes 30 to 60 minutes in good conditions, but it may take longer if it is damp or shaded.
Verify that covers are removed and connections are secure before starting.
Are Painted Engine Components Safe to Use Protectant On?
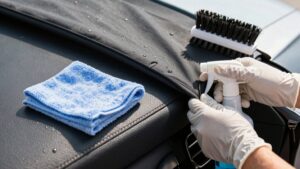
Yes, you can use compatible protectants on painted components, but test first. Choose a protectant labeled safe for painted surfaces and avoid silicone-heavy dressings that can cause streaking or attract dirt.
Apply sparingly with a microfiber applicator, let it cure briefly, then buff excess. Protectant safety depends on product chemistry and finish. Always spot-test and follow manufacturer instructions to prevent paint degradation or contamination.
How Do I Remove Stubborn Grease From Plastic Covers?
You loosen stubborn grease by pre-treating, agitating, rinsing, and protecting. Spray a plastic-safe degreaser on the plastic covers and let it dwell for 10–15 minutes. Then, scrub with soft brushes and microfiber to lift grime. Rinse with a low-pressure fan spray; use compressed air to displace water and towel-dry.
Repeat spot-treatments for persistent residues. Finish with a plastic covers care protectant to restore appearance and provide ongoing grease removal resistance.
Will Engine Cleaning Void My Vehicle’s Warranty?
Yes, cleaning the engine bay can affect warranty status in some cases. For warranty implications, perform a risk assessment: avoid direct spraying of electrical components, use manufacturer-approved cleaners, and cover sensitive parts.
If damage results from improper cleaning, such as water intrusion or corroded connectors, repairs may be denied. Document your method and products used, keep receipts, and follow dealer guidance to minimize disputes and demonstrate you didn’t cause warranty-voiding damage.
Can I Use Household Cleaners Instead of a Degreaser?
You shouldn’t. Household cleaners can damage rubber, paint, and electrical connectors; they are not formulated as degreaser alternatives for engine bays.
Use a purpose-made engine degreaser or a mild automotive-specific cleaner. If you must improvise, test a dilute biodegradable citrus or automotive all-purpose cleaner on an inconspicuous area first. Avoid electrical components, cover sensitive parts, and follow with thorough rinsing and drying to prevent corrosion or residue buildup.
Conclusion
You’ve covered the key factors for safe engine bay cleaning: work within recommended temperatures, cap the oil filler and check the dipstick, and avoid high-pressure washers. High-pressure streams can damage seals; they can force moisture into connectors and compromise sensors and wiring.
Use low-pressure methods, targeted degreasers, and controlled rinsing to minimize risks. Inspect and dry electrical components thoroughly after cleaning. Follow these precautions methodically to protect engine integrity and maintain reliable vehicle operation.