Engine Bay Cleaning Safety Precautions

When cleaning your engine bay, you’ll protect batteries, fuse boxes, ECUs, and intake openings.
Disconnect the 2-volt battery correctly and avoid high-pressure spray near electrical modules to prevent water intrusion and post-wash failures.
Photograph fuse layouts, remove fuses with a puller, and match amp ratings when replacing.
Seal the air intake and vulnerable sensors with plastic.
Loosen and remove the negative battery terminal first.
Cover connectors with foil, use low-pressure rinsing, and dry thoroughly.
Keep going for step-by-step protection and troubleshooting.
Quick Overview
- Turn ignition off, remove key, engage parking brake, and wear gloves and eye protection before starting work.
- Disconnect the 2V battery: remove negative terminal first, then positive, and insulate exposed posts and loose cables.
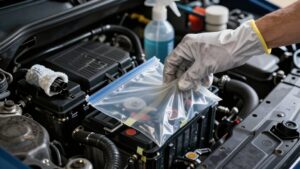
- Cover fuse boxes, ECU modules, sensors, and connector clusters with plastic or foil; secure to prevent water intrusion.
- Seal the air intake, MAF, and breather lines with a plastic bag to prevent water ingestion.
- Use low-pressure rinsing; avoid direct spray on electrical components. Then dry connectors and modules thoroughly before reconnecting.
Fuse Box Clearance Chart
Why does fuse box clearance matter when cleaning an engine bay? You need clearances to prevent water intrusion and to follow safety precautions: know fuse types, sizes, and which slots accept them so you can cover or remove appropriately before washing.
Identify fuses, photo the layout, and use a puller.
| Fuse Type | Dimensions (mm) | Typical Amps |
|---|---|---|
| Micro2 | 9.1×3.8×15.3 | 5–30 |
| Mini (ATM) | 10.9×3.6×16.3 | 2–30 |
| ATO/ATC | 19.1×5.1×18.5 | 1–40 |
| Maxi | 29.2×8.5×34.3 | 20–120 |
Match amp ratings to slot markings; avoid upsizing and keep the box covered. High-pressure spray near fuse boxes risks post-wash electrical failure.
2V Battery Disconnect Steps
How should you disconnect the battery safely before cleaning the engine bay? You’ll perform battery disconnection to eliminate live circuits and reduce shock or short risks; this preserves electrical protection. Follow these steps precisely:
- Park, engage parking brake, switch ignition off, and remove key. Wear gloves and eye protection.
- Locate and identify battery terminals. Always loosen and remove the negative (-) terminal first to break ground, then the positive (+).
- Secure loose cables away from terminals. Cover exposed posts with insulated caps or electrical tape to maintain electrical protection.
- If present, disconnect battery sensor or memory module per manufacturer instructions. Keep the battery on a non-conductive surface while you clean.
Water-Sensitive Component Map
You’ll start by mapping out all water-sensitive items: battery and terminals, electronic control modules, fuse box locations, air intake components, and any exposure-prone sensors. Mark each item’s exact position so you can apply targeted protection like plastic wrap or foil and avoid spraying nearby.
Use this map to plan the routing of hoses and the placement of covers to minimize water migration and post-wash failures.
Battery And Terminals
Battery terminals are among the most water-sensitive parts under your hood. So, disconnect the negative terminal first and fully insulate both posts with plastic bags or aluminum foil secured by zip ties before any cleaning.
After battery disconnection, mark polarity and remove jewelry to avoid shorts. Apply terminal protection: coat exposed posts with dielectric grease or corrosion inhibitor and secure covers once work is complete.
Keep wiring harnesses and starter connections wrapped and taped. Avoid spraying directly toward the battery area. Use low-pressure rinsing and direct runoff away from the tray to prevent acid dilution onto other components.
Inspect clamps and cable insulation for corrosion or fraying; replace damaged parts before reconnecting. Reconnect negative last. Then, test electrical systems for normal operation.
Electronic Control Modules
Where should you avoid water around the engine bay? Around Electronic Control Modules (ECMs) and their connector clusters: these are high-priority water-sensitive zones. You should map ECM locations before cleaning. Cover them with plastic or foil, and secure covers to maintain electrical insulation.
Avoid directing spray or high-pressure rinse toward module housings, wiring looms, and connector seals. Moisture risks include short circuits, corrosion of pins, and erratic sensor/actuator behavior that can be intermittent and hard to diagnose. Use low-pressure rinsing, allow thorough drying, and inspect dielectric grease or seal integrity after cleaning.
If a module is exposed or damaged, do not start the vehicle. Diagnose and repair connectors and insulation to prevent cascading electrical failures.
Fuse Box Locations
Like ECMs, fuse boxesesand their connector clusters are highly water-sensitive and need firm protection before any cleaning. Locate the fuse box(es), commonly near the battery, inner fender, or firewall, and inspect connector clusters for exposed pins. You’ll perform electrical masking: seal housings with plastic sheeting and waterproof tape, and secure covers with zip ties or clamps to prevent seepage.
Maintain battery safety by disconnecting the negative terminal and isolating the battery while you work. Avoid directing spray toward the fuse box; use low-pressure rinsing and blow-dry or absorbent towels after cleaning. Mark fuse box locations on your water-sensitive component map so you, or anyone following, won’t risk inadvertent water exposure during future engine-bay cleaning.
Air Intake Components
How will you protect the air intake and its related components when cleaning the engine bay? Identify the air intake path, filter housing, mass airflow ducting, and nearby breather lines before you start. Physically seal the intake opening with a clean plastic bag and nonconductive tape to prevent water ingress. Secure the bag so it won’t dislodge.
Shield nearby electrical items, especially the fuse box, with waterproof covers or foil-wrapped plastic to maintain circuit integrity. Avoid directing spray toward the intake, intake manifold ports, or vacuum lines. Use low-pressure rinse patterns and keep nozzle angles shallow.
After cleaning, remove covers, inspect seals and clamps, and dry components with compressed air or absorbent towels. Verify airflow sensors remain untouched; do not probe sensors and reassemble securely.
Exposure-Prone Sensors
Which sensors are most vulnerable to water intrusion and where are they located? You’ll find exposure prone sensors clustered around the intake, fuel rail, throttle body, and near the firewall. Common water sensitive components include MAF, MAP, crank and cam position sensors, O2 sensors, and ambient temperature sensors.
Before cleaning, identify each sensor’s exact mounting point and cover it with waterproof material; secure covers so they won’t shift. Avoid direct spray trajectories aimed at sensor housings and connector seals. If a connector looks corroded or loose, service it before washing.
After cleaning, remove covers, dry connectors, and apply dielectric grease to seal contacts. Treat sensors as precision instruments: minimal water exposure, controlled drying, and immediate inspection prevent electrical faults.
Wiring Harness Routes
Where do the wiring harnesses run, and why does their routing matter for engine-bay washes? You need to map primary harness paths before cleaning: they often follow valve covers, firewall edges, and frame rails. Identify junctions, connectors, and exposed splices so you can apply routes coverage—plastic bags or wrap—over vulnerable runs.
Keep water away from connectors and ground straps; avoid directing spray along harness channels that channel water toward sensitive modules. Maintain fusing clearance by noting inline fuse holders and relay boxes; don’t cover them in a way that traps moisture or blocks ventilation. Secure loose sections with temporary ties to prevent movement during washing.
After cleaning, inspect connectors for trapped water and restore any removed insulation or clips before reconnecting the battery.
Frequently Asked Questions
Can I Use a Pressure Washer on an Older Vehicle’s Engine Bay?
You shouldn’t use a pressure washer on an older vehicle’s engine bay. It creates engine bay risk by forcing water into delicate connectors, fuse boxes and seals; this can cause water intrusion and electrical faults.
Instead, disconnect the battery, cover sensitive components, and use low-pressure hose or spray. Apply engine-safe degreaser, let it soak, and gently agitate with soft brushes. Dry thoroughly and inspect before reconnecting the battery to avoid damage.
How Long Should Degreaser Sit Before Rinsing?
You should let engine bay degreasing products sit about 5–10 minutes before rinsing. For light grime, 3–5 minutes often suffices. For heavy oil and grease, extend to 10–15 minutes; do not let degreaser dry.
Check manufacturer instructions and keep rinse timing consistent to avoid prolonged chemical exposure. After dwell time, rinse with low-pressure water, working from top to bottom. Repeat degreasing if heavy residues remain.
Is It Safe to Clean the Engine Bay After Rain?
Yes, you can clean the engine bay after rain, but don’t rush. Make certain engine bay waterproofing measures held up: check wrapped electricals, sealed connectors, and covered intake areas before you start.
Wait until the engine and components reach room temperature and surface moisture has mostly evaporated. Use low-pressure water, engine-safe degreaser, and avoid spraying exposed electricals. Dry thoroughly and inspect for water intrusion to ensure rain exposure safety.
Which Personal Protective Gear Is Mandatory?
You must wear safety goggles or a face shield, chemical gloves, and long sleeves to protect from sprays and coolant leaks. Add oil-resistant gloves if handling solvents, and closed-toe shoes with good grip.
Use a respirator when degreasers produce fumes, and knee pads if you’ll crouch. Don’t skip eye protection and gloves; they prevent chemical burns, inhalation risks, and cuts from hidden debris while you clean the engine bay.
Can I Start the Engine Immediately After Cleaning?
No, don’t start the engine immediately after cleaning. You’ll wait until engine bay moisture is fully evaporated to avoid shorts and protect electrical safety.
Open the hood, let the engine cool, and park in a warm, ventilated spot or use low heat or air blowers to speed drying. Verify covers and connections are dry; remove protective wrappings and check battery connections before cranking to prevent post-wash electrical damage.
Conclusion
You’ve seen the critical areas to protect when cleaning an engine bay: fuse boxes, ECUs, battery and terminals, air intake, sensors, and wiring routes. Before you work, disconnect the battery following the 2-volt method. Cover fuse boxes and water-sensitive components, and route spray away from exposed connectors.
Use controlled low-pressure rinses and targeted cleaning agents. Inspect terminals, reconnect carefully, and test systems methodically to ensure nothing’s been compromised. Safety first, then cleanliness.