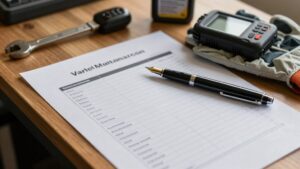
Exterior Wash Workflow Checklist

You’ll set pressure to 1,000–2,000 PSI (electric 1,200–1,900) and use 25°–40° nozzles at about 6–12 inches, adjusting for grime. Don’t drop below ~1,000 PSI for most cars. Keep wider fans to reduce impact.
Inspect nozzles each shift; flush lines after use. Use inline filters and avoid particulate-heavy liquids. Schedule deep cleans; disassemble and soak parts as needed. Store assemblies dry and covered, and log maintenance. Keep going to see the full step-by-step checklist.
Quick Overview
- Start with equipment checks: confirm PSI (1,000–2,000), GPM (1.2–3.0), and correct 25°/40° nozzles.
- Inspect nozzles for wear and clogs before every shift; clean with soft brush and approved solvent.
- Wash technique: maintain 6–12 inches distance, use wider fan tips, and adjust PSI from 1,000 upward as needed. After shift, flush lines and nozzles with clean water; purge chemicals and run short bursts to prevent buildup.
- Schedule regular deep cleans, filter maintenance, storage drying, and log all inspections, replacements, and tests.
Water Pressure & Flow Rates
How much pressure and flow you use will determine cleaning effectiveness and paint safety. So set your washer to the vehicle-specific ranges and keep a safe distance. You’ll target PSI optimization and GPM balance: use 1,000–2,000 PSI and 1.2–3.0 GPM for cars. Keep 6–12 inches away and avoid nozzles under 25 degrees.
Adjust for wheels with a 25° tip and don’t exceed 2,200 PSI. Electric washers around 1,200–1,900 PSI are preferred. Match higher GPM with lower PSI for better rinsing and less risk. Always confirm machine specs and use the correct nozzle and distance. Rinse soap thoroughly and avoid directing spray into sensitive openings.
| Parameter | Guideline |
|---|---|
| PSI | 1,000–2,000 |
| GPM | 1.2–3.0 |
| Nozzle | 25°/40° |
| Distance | 6–12 in |
| Max PSI | 2,200 |
5 Psi Minimum Guideline
While you’ll often see recommendations for PSI ranges, never go below the minimum threshold needed to remove loosened debris safely: about 1,000 PSI for most passenger cars. Lower pressure can leave grit that leads to swirls during the contact wash. You’ll balance psi minimum with nozzle choice and distance, keeping safety and finish protection front and center. Use measured tests on discreet panels before full application.
Keep records of two word discussion ideas like “pressure test” and “safe distance” for team briefings.
Start at 1,000 PSI and adjust up only as needed for heavy grime. Use wider fan nozzles to reduce concentrated force on paint. Maintain 12–18 inches distance, varying by surface and soil. Log settings and observations to refine your process.
Avoid Prolonged Nozzle Blockage
Check nozzles before every shift and follow a routine inspection to spot wear or buildup early. Flush lines and strainers after each use; fit proper inline filters; and avoid running thick or particulate-heavy liquids that cause clogs.
Schedule regular deep cleans of nozzle assemblies to maintain consistent spray patterns. This will help to prevent unexpected failures.
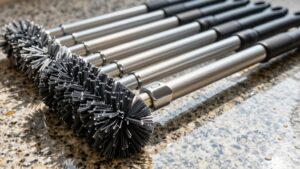
Nozzle Inspection Routine
Why inspect nozzles regularly? You’ll prevent spray pattern degradation, uneven chemical delivery, and safety hazards. Begin every shift with a visual nozzle inspection: check for cracks, buildup, and misalignment.
Use a soft brush and approved solvent to remove debris; never force obstructions with metal tools. Verify spray angle and flow against the specification sheet. Then, perform routine calibration on pressure and output to confirm consistent delivery. Record findings on the log, noting any replacements or adjustments.
If you detect persistent clogging, tag the nozzle out of service and replace it. Do not continue operations. Wear gloves and eye protection during inspections; follow lockout procedures when isolating lines. Regular checks reduce downtime and maintain safe, effective washing.
Flush After Use
After inspecting and addressing nozzle issues, flush each nozzle immediately after use to prevent chemical buildup and blockages that can degrade spray patterns and create safety risks. You’ll purge residual cleaners by running clean water through the system until flow is clear.
Hold the gun open at a safe angle, monitor water pressure, and avoid kinks that reduce flow. If flow remains uneven, repeat flushing and check connections for debris. Use short bursts and a final continuous rinse to clear internal passages. Cap and store nozzles dry to prevent contamination and corrosion.
Log any persistent restriction for repair or replacement. Consistent flush after use minimizes downtime, preserves spray performance, and maintains a safer, more reliable wash operation.
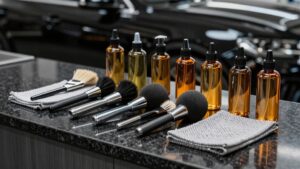
Use Proper Filters
How will you prevent nozzle blockages before they start? Use proper filters on your supply lines to trap debris and particulates that lead to nozzle restriction. Install inline strainers and replace or clean them on a set schedule: daily for heavy use; weekly otherwise.
During setup, perform a quick nozzle inspection: remove the tip, check spray pattern, and run water through the nozzle to verify flow. If flow drops, clean filters first; then retest the nozzle. Never force debris into the orifice.
Keep spare filters and nozzle tips on hand and log replacements in your workflow checklist. This minimizes downtime, reduces hazardous spray irregularities, and keeps pressure-washer performance consistent and safe throughout the exterior wash process.
Avoid Clogging Liquids
Want to prevent prolonged nozzle blockages? Inspect and flush nozzles before each shift: remove debris, run clear water, and cycle cleaning solution in short bursts to dislodge buildup. Choose low-viscosity products and follow compatibility considerations with pumps, seals, and nozzle orifices to reduce residue risk.
Store concentrated chemicals sealed and label with dilution rates to avoid accidental over-thickening. Implement avoidance strategies: strain liquids through fine mesh when mixing, use inline filters, and keep feed lines elevated to prevent sediment pickup.
If you detect reduced spray or uneven fan patterns, stop and depressurize. Perform a targeted rinse and soft brush clean. Log incidents and corrective actions so you can spot patterns and prioritize safer product selections.
Scheduled Deep Cleans
A scheduled deep clean keeps nozzles flowing and prevents extended downtime by removing buildup before it hardens. You’ll set regular intervals, inspect each nozzle assembly, and perform a systematic flush and brush procedure that targets orifices, screens, and seals to maintain consistent spray patterns and protect pump components.
You’ll follow a checklist: isolate pressure, relieve lines, wear gloves and eye protection, and document start and end times. Disassemble nozzles only as needed, soak removable parts in approved solution, and use soft brushes and compressed air to clear deposits. Reassemble with new seals if worn, test at low pressure, and record results.
Two word discussion ideas: Maintenance scheduling, Safety reminders—both belong in your routine to prevent prolonged nozzle blockage.
Store Dry And Covered
After your scheduled deep cleans and nozzle inspections, store all spray assemblies dry and covered to prevent moisture-driven blockages and contaminant buildup. You’ll drain lines, blow out residual water with compressed air, and verify nozzles are free of debris before placing them in a covered shop cabinet or sealed case.
Label assemblies so you can match spray patterns to intended tasks and avoid incorrect flow rates that compromise rinse effectiveness. Periodically cycle equipment to confirm water pressure and flow rates remain within spec; stagnant systems hide leaks and degraded seals.
Train staff to log storage and testing steps, and post a simple checklist by the storage area. Consistent dry, covered storage reduces downtime and prevents safety risks from sudden pressure changes.
Frequently Asked Questions
Can I Use Household Detergents Instead of Car Shampoo?
You shouldn’t use household detergents for washing your car. Household detergents can strip wax, damage sealants, and harm paint. Use car shampoo differences to guide your choice.
Car shampoos are pH-neutral, lubricating, and formulated to lift dirt without removing protection. If you must, dilute household detergent heavily and test an inconspicuous spot. However, avoid frequent use.
Follow a snow-foam pre-wash and two-bucket contact wash to minimize marring; this will protect coatings for safe, consistent results.
How Often Should Wheels Be Deep-Cleaned?
You should deep-clean wheels every 4–6 weeks under normal driving. Clean them more often if you track the car or drive in salty or winter conditions. For wheel maintenance, inspect weekly for heavy brake dust or tar; perform spot cleaning as needed.
Follow a safe process: use a dedicated bucket and mitt, choose appropriate (non-acidic or acidic) cleaners for the wheel finish, agitate crevices with brushes, then rinse and dry thoroughly to prevent corrosion.
Is It Safe to Wash a Hot Car in Direct Sunlight?
You shouldn’t wash a hot car in direct sunlight. Heat accelerates soap and water drying, causing water spots, streaks, and spotty removal of contaminants.
Cool the vehicle first by parking in shade or waiting until it’s cooler. Work in small panels, keep surfaces wet, and use a quick rinsing and drying process.
Protect yourself with gloves and eyewear when handling chemicals. Follow product instructions for safe use.
What’s the Best Way to Dry Chrome Trim Without Streaks?
Dry chrome trim by blotting excess water with a clean microfiber. Then use a second plush microfiber to gently dry and prevent streaks. For chrome drying, work panel by panel; patting rather than rubbing to avoid scratches and water spots.
Use a dedicated chrome-safe polish sparingly and buff with a soft cloth, following polishing techniques that remove residue. Wear gloves; avoid direct sun and inspect under varied light to ensure streak prevention.
Can Razor Blades Remove Stubborn Paint Overspray?
Yes, razor blades can remove stubborn paint overspray if you use them carefully. First, wet the surface and use soapy water or a clay lubricant.
Hold the razor at a low angle and shave away overspray with light, controlled strokes. Protect surrounding trim with tape; work slowly and check for scratches.
Consider two word discussion ideas: safety protocol, technique details. Don’t rush: blades damage paint if misused.
Conclusion
You’ve covered the essentials for a safe, efficient exterior wash workflow. Keep pressure at or above 5 psi, inspect and flush nozzles after use, and use proper filters to prevent clogs. Avoid thick or sticky liquids and schedule regular deep cleans to remove buildup.
Store equipment dry and covered to prevent contamination and damage. Following these steps and a routine inspection will minimize downtime, reduce safety risks, and extend the life of your gear.