How to Cover Electrical Components When Cleaning Engine Bay
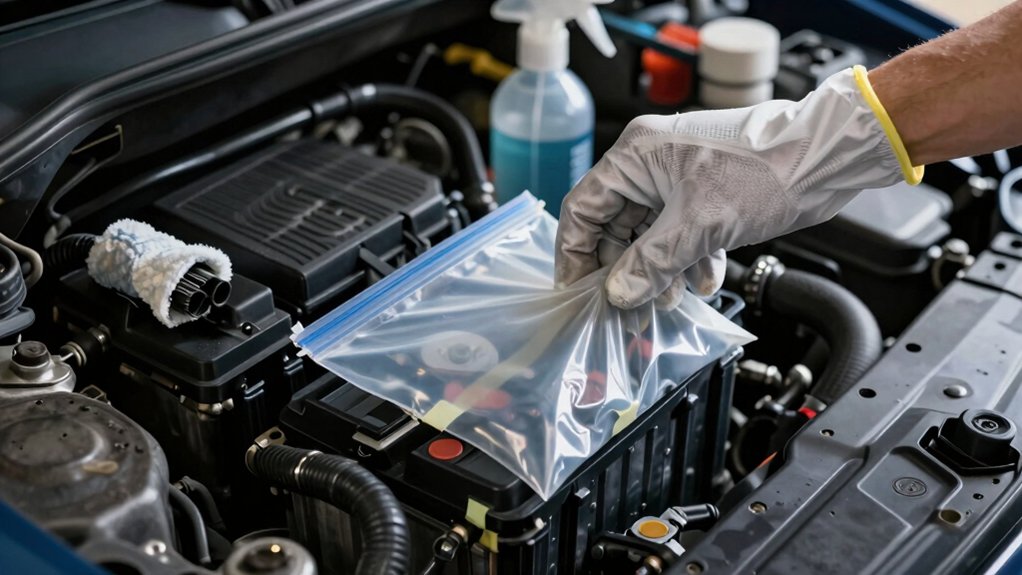
When cleaning your engine bay, cover battery posts and the fusebox with correct-size OEM or snap-fit caps (e.g., Fiesta B‑stud or Silverado positive caps).
Use silicone boots or polyethylene bags for exposed connectors. Apply a thin coat of dielectric grease to terminals first; seat connectors fully; then tape or zip-tie masks to prevent spray intrusion.
Avoid blocking vents or cable routing and check seals afterward. Keep going for step‑by‑step prep, coating, and inspection tips.
Quick Overview
- Identify and remove or mask low-sitting connectors and exposed junction blocks before cleaning to prevent spray and runoff contact.
- Clean and dry terminals. Then apply a thin coat of dielectric grease to male pins and exposed contacts before covering.
- Use OEM-style snap-fit covers or properly sized aftermarket caps that match the junction block and cable routing.
- Protect connectors with polyethylene bags, silicone caps, or PVC/vinyl tape secured by zip-ties or automotive tape to keep water out.
- After cleaning, remove masks. Inspect seals and pins for moisture or corrosion, dry with compressed air, reapply grease, and reseal.
Battery & Fusebox Cover Sizes
How do you pick the right cover size for the battery and fusebox? You check battery compatibility, measure junction blocks, and match OEM snap-fit specs. For Fords (Fiesta 2011, 2014–2019) use SKU 8V5Z14A003C; it’s a B-stud, 0.10 lb snap-fit. For GM trucks (Silverado 2015–2019) use part 22945779 that snaps onto the positive cable junction.
Aftermarket universal covers exist, but verify fit before cleaning.
| Vehicle/Type | Part/Style | Fit notes |
|---|---|---|
| Ford Fiesta | 8V5Z14A003C | B-stud, OEM snap-fit |
| Silverado | 22945779 | Junction block snap-on |
| Corvette C5 | HCF/steel options | Aesthetic + snap-fit protection |
Waterproof Dielectric Grease Checklist
Picking the right battery and fusebox covers gets you partway to protecting connections; now make sure the contacts themselves stay dry and conductive by using dielectric grease correctly. You’ve got waterproofing roughed in with covers and tape. Follow this dielectric grease checklist to finish the job.
- Clean contacts: Remove corrosion, dry with microfiber or compressed air.
- Apply thin film: A light, even coat on terminals and male pins; no globbing.
- Seat connectors fully: Push until locking tangs engage; then wipe excess.
- Seal exposed junctions: Add a dab around housings and use tape or boot over it.
This dielectric grease checklist keeps moisture out, prevents voltage drop, and preserves connectors during engine bay cleaning.
Corrosion-Prone Connector Masking
Start by identifying connectors that sit low, are exposed to road spray, or show green/white deposits. Choose masking materials that match connector plastics: thin plastic bags, electrical tape, or specialized wraps.
Prep connectors by cleaning contacts and gently drying them first. After applying a protective coating like dielectric grease, secure your masks with tape or zip-ties to keep moisture out during cleaning.
Identify Corrosion-Prone Areas
When should you focus on masking connectors? Focus before you spray or agitate: any time cleaning risks moisture or cleaner reaching terminals. Identify corrosion prone areas by inspecting battery terminals, sensor plugs, exposed harness splices, and ground points. These get the most runoff and salt buildup.
Look for green or white deposits, flaking metal, or loose boots; those are priority spots. Masking advice: prioritize connectors near the front, low edges, and under intake components where water channels. Also cover aged insulation and aftermarket splices that lack OEM seals.
Work methodically: map each connector, note vulnerable clips, and apply temporary covers to prevent chemical contact. After cleaning, dry and inspect masked areas. Then remove covers and treat any early corrosion found.
Choose Compatible Masking Materials
Having masked corrosion-prone connectors and mapped vulnerable spots, you’ll want materials that actually block moisture, resist solvents, and won’t leave conductive residue. Choose polyethylene bags or silicone caps for full waterproofing; they’re inert and don’t shed particles. Use automotive-grade PVC tape or vinyl electrical tape for seams; they stick when wet and won’t dissolve with cleaners.
Avoid household tapes and glues that can leave conductive residue or attract dirt. For harnesses, pick specialized connector wraps that breathe but repel water. Keep labeling simple so you don’t introduce privacy concerns by writing sensitive info on covers.
Don’t mix materials from unrelated topics (plumbing or food-grade wraps); they may fail chemically. Test one connector before treating the whole bay.
Prepare Connectors Properly
Because corrosion-prone connectors are small but critical, you’ll prepare them deliberately to prevent water and cleaner ingress: wipe each connector with a lint-free cloth, inspect seals and pins for corrosion or damage, and apply a thin dielectric grease to exposed terminals before masking.
Next, seal connectors with purpose-made connector boots or wrap with electrical tape overlapped tightly; avoid loose coverings that trap moisture. Use plastic bags only where boots don’t fit, securing edges with tape to create a waterproof barrier.
Label connectors if you remove any for cleaning to avoid reinstalling the wrong plug. Don’t confuse this with an irrelevant topic or treat masking as an unrelated concept; connector prep is a distinct, necessary step that reduces corrosion risk and simplifies post-cleaning inspection.
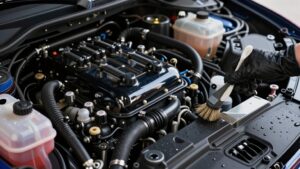
Apply Protective Coatings
A thin, even coat of a suitable dielectric grease or corrosion-inhibiting spray will seal connector pins and exposed terminals against moisture and cleaner overspray. So, apply it sparingly with a brush or foam swab to avoid attracting dirt. When you target corrosion-prone connector areas, first use masking materials: small pieces of plastic and electrical tape to isolate surrounding wiring and sensor housings.
Coat pins, terminal faces, and the immediate connector cavity; don’t smear onto mating surfaces that must conduct. For larger assemblies, combine light spray coats with brush-applied grease where access is tight. Maintain battery protection by avoiding sprays near terminals unless they’re wrapped or disconnected.
Let coatings cure per product instructions, then re-mask if you’ll rinse again. This ensures seals stay intact and contaminants are kept out.
Secure Masking Against Moisture
You’ll want to lock down masking after coatings cure so moisture can’t seep into connector cavities during rinsing or storage. Use irreversible masking on delicate sensor plugs where repeated seal failure would be costly. Press the tape firmly; then add a wrap of plastic bag secured with heat-resistant tape. For corrosion-prone connector masking, fold tape into a double layer at entry points to prevent capillary action.
Add thermal shielding where engine heat can soften seals. Place a thin aluminum-backed tape or dedicated thermal sleeve between the connector and hot plumbing. Tie harnesses to prevent movement that could pry seals loose during pressure washing. Label masked assemblies with a marker for removal sequencing.
Finish by checking adhesive bonds. Replace any mask showing gaps before you proceed with rinsing or storage.
Inspect After Cleaning
How do you verify that corrosion-prone connector masking survived the wash? Check every taped and bagged connector visually and by touch for moisture or compromised seals. Peel back one edge of the protective tape at each harness junction. Look for water intrusion, corrosion spots, or lubricant washout.
Confirm battery protection remained intact at terminals and cables; any dampness requires immediate drying. Use compressed air (30–40 PSI) to blow out trapped water, then wipe with microfiber towels. Reseal compromised covers with fresh electrical tape and replace soaked bags.
Apply a light anti-corrosion spray to exposed terminals and connector pins after drying. Reconnect the battery only when all components are fully dry and water sealing is verified.
Frequently Asked Questions
Can I Use Cling Film Instead of Plastic Bags for Electrical Covers?
You can use cling film in a pinch, but it’s not ideal for electrical safety. Cling film can seal small connectors temporarily and keeps splash off. Yet, it tears easily and doesn’t tolerate heat, oil, or abrasion.
Use heavy-duty plastic bags, specialized wraps, and tape when possible. If you use cling film, double-wrap, secure edges with electrical tape, and avoid hot components. Inspect carefully for pinholes before cleaning and after drying.
Should I Start the Engine Briefly After Cleaning to Check Systems?
Yes, but only after thorough engine bay inspections and ensuring battery safety. Don’t start it wet: Remove covers and dry connectors with compressed air (30–40 PSI). Inspect for moisture or loose wiring, and reconnect the battery last.
Briefly crank the engine, listen for odd noises, and watch for warning lights or leaks. If anything’s off, shut down immediately and troubleshoot. Don’t risk electrical shorts or corrosion.
Is a Pressure Washer Safe if Kept Two Feet Away?
No, you shouldn’t assume safety just by staying two feet away. Pressure washers still spray concentrated water and can force moisture into connectors or seals. You’ll want a two word idea: low pressure. Two word idea: safe distance.
Use low-pressure rinse; keep nozzle at wide fan angle. Avoid direct shots at alternator, fuse box, sensors. Cover electricals, tape seams, and dry thoroughly before reconnecting the battery.
Can I Use WD-40 on Exposed Metal Terminals Before Cleaning?
You shouldn’t spray WD 40 on exposed electrical terminals before cleaning. WD 40 usage can displace moisture but leaves an oily film that attracts dirt and can impede connections.
For electrical terminals safety, disconnect the battery. Clean corrosion with a baking soda solution and a brush, rinse and dry thoroughly. Then apply a dedicated contact cleaner or a light dab of dielectric grease to protect terminals without leaving conductive residue.
How Long Should I Wait Before Reconnecting a Disconnected Battery?
You should wait until the engine bay is completely dry before reconnecting the battery. This typically takes 30 minutes to several hours depending on the drying method. For battery safety, confirm no visible moisture. Remove all covers and tape, and use compressed air or microfiber towels to dry connectors.
When everything’s dry and inspected, reconnect the negative terminal first, then positive. If unsure, wait longer or consult a technician for reassurance.
Conclusion
When cleaning your engine bay, cover batteries, fuseboxes, and corrosion-prone connectors with appropriately sized waterproof masks or plastic bags secured with tape or zip ties.
Prep terminals by removing heavy corrosion; then apply dielectric grease sparingly to prevent moisture intrusion. Choose materials compatible with heat and chemicals, and double-check seals around wire bundles and sensors.
After cleaning and rinsing, remove covers, inspect connections, and reapply protective coatings as needed to ensure reliable electrical performance.