How to Remove Old Sealant From Paint
You’ll remove old sealant from paint by controlling temperature, using targeted solvents, and gentle mechanical action to avoid damaging the finish. Keep ambient and substrate temps below about 120°F (49°C). Test a small area, and warm only locally if needed.
Put on nitrile gloves, eye protection, and a respirator for solvents. Use plastic scrapers, microfiber towels, and a temperature probe; try solvent swabs and repeat testing until residue lifts. Continue for detailed guidance and stepwise techniques.
Quick Overview
- Test a small area first to confirm paint compatibility and reveal how the sealant responds to heat or solvent treatment.
- Use controlled, localized heat (below ~120°F/49°C) to soften sealant without degrading paint or adhesive bonds.
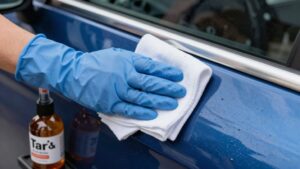
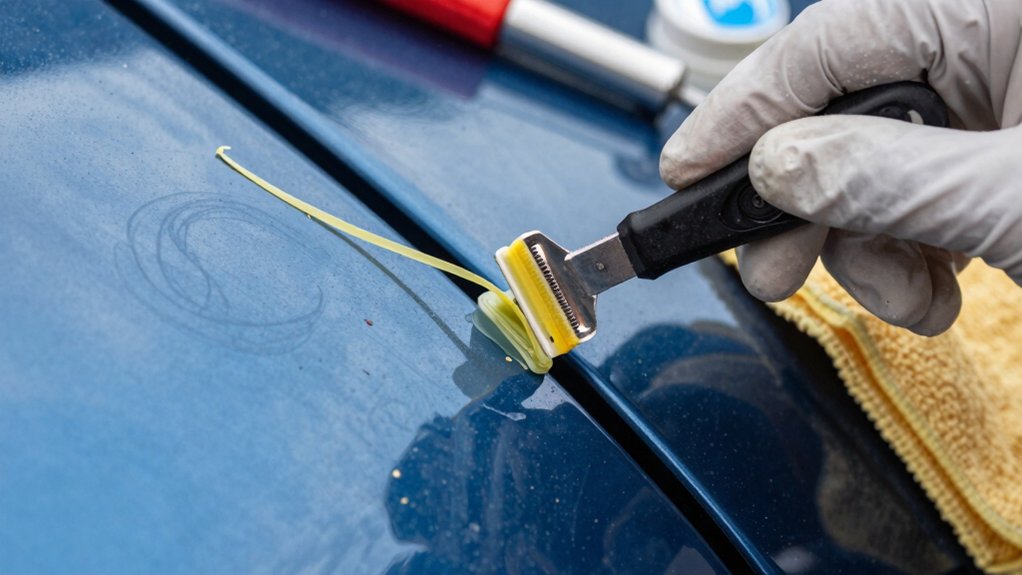
- Apply a manufacturer-recommended solvent sparingly, wait briefly, and then gently lift softened sealant with plastic scrapers.
- Avoid metal tools and aggressive abrasion. Finish with a microfiber cloth and appropriate mild cleaner to remove residue.
- Wear nitrile gloves, eye protection, and a respirator for solvents. Monitor substrate temperature with a probe during work.
Sealant Softening Temperatures Chart
Why does temperature matter when removing or working near sealants? You must control ambient and substrate temps because many sealants soften, lose adhesion, or cure unevenly outside recommended ranges.
Work methodically: Note softening temps (silicones ~212°F/100°C degrade; general joint sealants risk bubbles >120°F/49°C; urethanes skin fast >86°F/30°C). Test local substrate temperature before heating or applying solvents. Avoid creating unrelated topic or tangential discussion about coatings here.
| Parameter | Practical limit |
|---|---|
| Avoid above | 120°F (49°C) for general sealants |
| Watch for | >190°F (88°C) reduces some bonds |
If you plan heat-assisted removal, target controlled, localized heating and verify with small-area tests to prevent irreversible damage.
Tool & PPE Quick Checklist
A compact, well-organized kit makes stripping old sealant safer and faster. Assemble only the tools and PPE you’ll actually use: nitrile gloves, eye protection, a respirator for solvents, heat-resistant gloves for any controlled heating, plastic scrapers, a variety of microfiber towels, a foam cannon or spray bottles for APC/IPA, a soft wash mitt, a plastic razor, a temperature probe, and a low-pressure detailer’s polisher (if light polishing may be required).
Keep the checklist focused: inspect PPE for damage, label solvent containers, and stow tools to avoid cross-contamination. Follow a strict PPE protocol and documented tool safety steps: glove changes between solvent and wash stages, eye protection when heating, and respirator use during solvent-heavy tasks.
Maintain clean towels per panel and record tool condition after each job.
- Relief — you’re prepared.
- Confidence — risks reduced.
- Precision — results repeatable.
Cure Times by Sealant Type
You’ll need to contemplate different cure and set behaviors because silicone, polyurethane, acrylic latex, butyl rubber, and hybrid sealants all reach functional hardness on different schedules. Know that silicones and butyls often skin quickly, but they continue curing for days. Polyurethanes follow a staged chemical cure. Acrylic latex dries by solvent evaporation, and hybrids can mature over weeks.
Use those timelines to choose appropriate removal methods and safe test points before aggressive chemical or mechanical work.
Silicone Cure Times
How long does silicone take to cure on automotive surfaces depends on formulation, thickness, temperature, and humidity. Most consumer RTV silicones skin in 5–30 minutes and reach full cure in 24–48 hours under typical shop conditions. You’ll plan removal timing around cure stage: uncured or tacky material wipes away easier with solvents; fully cured silicone requires mechanical lift or strong solvents.
Ambient heat accelerates silicone cure; cold, damp conditions slow it. Be aware silicone cure can be impeded by wax presence or contaminant films that prevent proper crosslinking, producing tacky residues. Test a small patch to confirm cure before aggressive removal. Allow full cure when possible to avoid smearing. Use heat and plastic scrapers for cured beads.
Polyurethane Cure Schedule
When will polyurethane sealants reach handling strength and full cure depends on their chemistry, film thickness, and environmental conditions. Expect a tack-free surface within 1–4 hours; handling strength in 6–24 hours; and full cure from 3 days up to 7–14 days under typical shop temperatures and humidity.
You should plan removal and testing around those windows: light mechanical aggression after handling strength, but avoid aggressive abrasion until full cure to prevent substrate marring. Thinner films cure faster; thicker films extend cure and reduce immediate scratch resistance.
Use solvent checks and controlled wash tests to confirm cure before heavy polishing. If sealant abrasion appears excessive during early removal attempts, wait longer or use chemical softening. Document ambient temperature and RH so you can reproduce consistent cure expectations.
Acrylic Latex Drying
Curious about how long acrylic-latex sealants take to dry? You’ll find predictable acrylic latex drying dynamics governed by temperature, humidity, and film thickness. At 70°F (21°C) and 50% RH, surface dry occurs in 30–60 minutes; handling strength develops in 4–8 hours.
Full cure: solvent and coalescent evaporation plus polymer interlinking typically requires 24–72 hours. Higher humidity or lower temperatures slow coalescence and extend tack time. Thicker beads or multiple layers increase cure proportionally.
When removing old sealant, plan mechanical or chemical methods only after adequate cure to avoid smearing partially cured material. Test a small area to confirm non-tackiness and loss of solvent odor before aggressive cleaning. Record ambient conditions to predict repeatability.
Butyl Rubber Setting
Having covered acrylic-latex cure behavior and removal timing, you’ll find butyl rubber behaves very differently: it cures primarily by physical setting and slow solvent loss rather than by polymer crosslinking. You should expect long open times; tack reduces as solvents evaporate and the material consolidates.
Removal windows are wider early on; however, once a surface skin forms, you’ll need mechanical action or targeted solvents.
Measure cure by touch and solvent smell rather than cure-time charts. Ambient temperature and ventilation dominate setting rate. For removal, use heat to soften and plastic scrapers for bulk. Then, apply compatible solvent sparingly to avoid paint damage. Test solvents on inconspicuous panels. Document panel-by-panel progress so you can adjust mechanical technique before resorting to stronger chemicals or abrasion.
Hybrid Sealant Maturation
Because hybrid sealants blend polymeric carriers, silica modifiers, and varying solvent systems, their surface maturation follows distinct phases you can monitor. Each ingredient mix alters open time and final hardness. You’ll observe an initial tacky stage (minutes to hours) as solvents evaporate. Then a gel phase occurs where polymer chains orient and surface energy shifts. Finally, a hardening phase takes place over days as crosslinking and silica network formation finish.
Track hybrid maturation by water behavior: beading indicates incomplete cure, while sheet flow shows substantial breakdown for removal. For sealant aging older than weeks, mechanical and chemical methods converge. Pre-wax cleansers or light polishing followed by IPA wipes are effective. Log cure times per product to predict removal difficulty and select appropriate stripping steps.
Frequently Asked Questions
Can I Use Dish Soap Instead of Car Shampoo to Strip Sealant?
You can, but you shouldn’t routinely. Dish soap will strip some sealants; yet it’s harsher on waxes and paint-friendly polymers than dedicated car shampoo. Use two-bucket washing, dilute dish soap well, agitate with a clean microfiber mitt, then perform a thorough water rinse.
For stubborn or durable sealants, switch to car shampoo at 2oz/gal, APC or a pre-wax cleanser. Verify removal by checking for loss of beading.
Will Sealant Removal Affect Freshly Painted Panels?
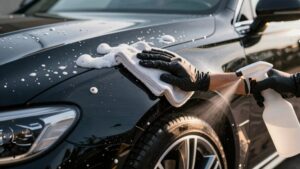
Yes, removing old sealant can affect freshly painted panels if you’re too aggressive. You should use gentle chemical methods: two-bucket wash, CG Citrus Wash at paint-prep ratio, and APC carefully. Avoid abrasives until paint cures fully.
Test solvents on a small area. Use IPA wipes sparingly after curing, and dry panels thoroughly. Aim to preserve fresh paint protection by preferring low-dwell cleaners and light polishing only when necessary.
How Long Should I Wait After Removal to Reapply Protection?
You should wait until the surface is fully clean and dry: typically 30–60 minutes after final rinse and drying, before reapplication. Reapplication timing depends on confirming no hydrophobicity (no beading) and ensuring paint temperature is moderate.
If you used IPA or a pre-wax cleanser, wait only long enough for solvent odor to dissipate and the surface to feel neutral; usually 10–20 minutes. In all cases, avoid immediate polishing on hot panels.
Can I Remove Sealant in Cold or Freezing Temperatures?
You can, but you shouldn’t do full stripping in cold weather or during frozen cleanup. Effectiveness drops and risks rise. Cold reduces chemical activity; therefore, APCs, IPA wipes, and pre-wax cleansers work poorly and may leave residues.
If you must, warm the panel with ambient heat, use heated water, shorten dwell times, avoid letting products freeze, and dry thoroughly. Wait for temperatures above freezing for reliable, safe removal and reapplication.
Are There Eco-Friendly Disposal Methods for Removed Sealant Residue?
Yes, you can use eco friendly disposal for sealant residue. Collect used towels, rinse water, and solvent waste into labeled, sealed containers. Let solids settle; decant clear water to sanitary drain if local rules allow.
Recycle concentrated waste at hazardous-waste facilities. Use biodegradable cleaners and low-toxicity APCs to minimize harm. Document disposal steps and follow municipal hazardous-waste guidelines.
Don’t pour concentrated residues down storm drains; they bypass treatment.
Conclusion
You’ve got the data and tools; now use them methodically. Start by checking the sealant type and its softening temperature. Don PPE, and pick the right scraper and solvent. Soften according to the chart: heat, solvent, or approved remover. Then peel or scrape in the direction of the grain. Work in small sections and avoid gouging paint.
Clean residue with solvent safe for your finish. Let substrates fully cure and inspect for missed areas before repainting.