Paint Swirl Marks Vs Scratches
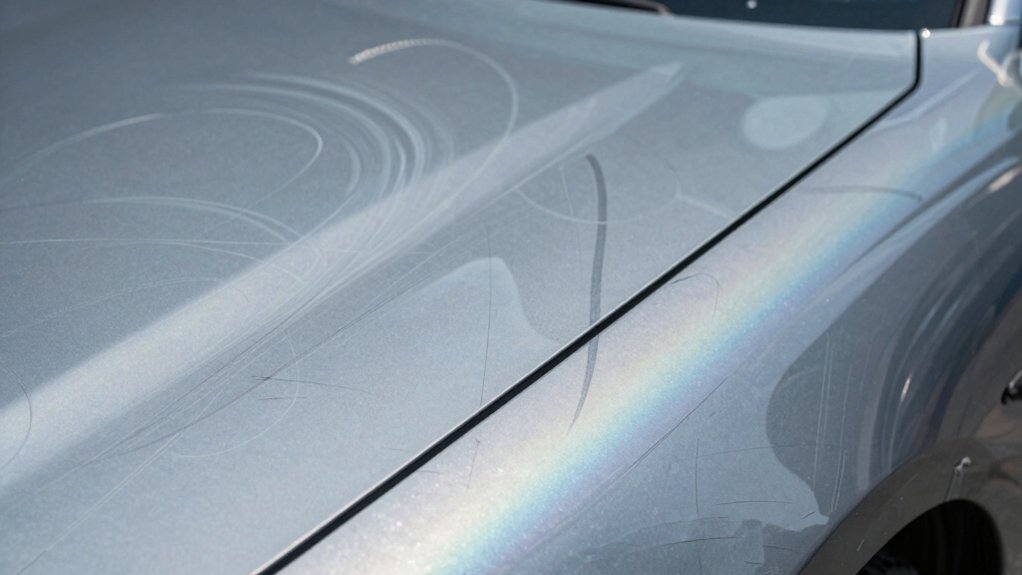
You’ll spot swirls as shallow, micro-haze in the clear coat that scatter specular highlights and vanish under wetting. Scratches are deeper, edge-defined cuts that keep sharp contrast and can be felt. Use controlled, angled light and a polarized filter to reveal specular artifacts. Test wet and dry to distinguish masked haze from true cuts.
Consider layer thickness and panel contour for visibility. Keep going and you’ll uncover practical inspection and correction tips.
Quick Overview
- Swirl marks are fine, clustered micro-hazes in the clear coat; scratches are deeper, linear cuts that can be felt.
- Swirls scatter light diffusely like micro-mirrors; scratches create distinct, often darker lines interrupting specular reflection.
- Wet surfaces mask swirls by filling micro-irregularities. Dry inspection reveals true contrast and edge sharpness.
- Shallow swirls (
- Visibility depends on inspection angle, surface curvature, clear coat thickness, and polarization. Grazing light past the critical angle highlights swirls.
Haze Depth & Width Chart
How deep are those light scuffs and how wide do they run? You assess haze importance by visual reflection and simple depth measurement: haze sits in the top clear coat, microscopic; it is not catchable by a fingernail. You note width as fine clustered marks, typically under 0.1mm; they form spiderweb patterns on dark paint.
| Attribute | Value |
|---|---|
| Location | Top clear coat (micro) |
| Depth | Shallow; not felt |
| Width | Fine; |
| Detectable | Light reflection / sunlight |
| Removal | Mild polish; 1–2 passes |
You act methodically: test a small area, measure paint thickness before correction, and choose polish intensity based on haze depth to avoid overcutting.
Wet vs Dry Haze Limits
When you compare wet and dry haze limits, remember wet haze, seen with water or polish residue present, masks fine surface irregularities and makes shallow swirls appear less severe. Dry haze reveals the true contrast and sharpness of light-scattering defects. Assessing both conditions gives a more accurate boundary for acceptable finish quality and guides how aggressive your correction needs to be. You should inspect both states to set objective limits and choose correction level.
Consider:
- Wet haze reduces perceived depth of micro-abrasions, lowering apparent defect density.
- Dry haze exposes edge contrast and angular scattering, increasing measured severity.
- Measure haze under controlled lighting in both conditions for repeatable thresholds.
- Use differential assessment to decide compounding versus polishing.
Light Refraction Angle Thresholds
You’ll want to separate specular versus diffuse reflection when assessing whether a mark is a swirl or a deeper scratch. Swirls act like micro-mirrors while scratches scatter light. Note the clear coat’s critical angle and how layer thickness shifts the refraction threshold. This change affects the viewing-angle visibility of defects and can introduce polarization contrasts.
Use controlled angles and polarized light to reveal which defects are surface-level swirls and which penetrate deeper.
Specular Versus Diffuse Reflection
Ever wondered why swirl marks flare on a glossy panel but seem to vanish on a matte finish? You observe that glossy clear coats produce strong specular reflection: light mirrors the surface angle, making tiny scratches act as micro-facets that redirect beams into your eye. Matte finishes scatter light via diffuse reflection, breaking coherent highlights so those micro-scratches don’t produce visible streaks.
You can predict visibility by considering incident angle and observer position. Specular highlights intensify defects near grazing angles, while diffuse surfaces yield low-angle-independent brightness. For inspection and correction, you’ll use controlled, angled lighting to reveal specular artifacts on gloss but won’t expect the same cues on matte. This distinction guides polishing choice, inspection angle, and whether corrective abrasion is needed.
Critical Angle For Clear Paint
Specular highlights revealed on glossy panels let you predict where micro-scratches will show, but to quantify that visibility you need to consider the clear coat’s critical angle for refraction. You assess the angle where incident light transitions from transmitted to internally reflected within the clear coat. Beyond that threshold, surface microtopography dominates reflected intensity. That threshold controls swirl magnification: small asperities scatter light differently near the critical angle, boosting imperfection visualization without deeper damage.
When you inspect panels, adjust your light incidence to probe just past the critical angle to reveal shallow swirls while avoiding exaggerated perception of actual depth. Understanding this optical behavior helps you separate cosmetic surface defects from factors affecting paint durability and informs corrective polishing strategies.
Viewing Angle Visibility Threshold
How does the angle you view a panel change what you see? You’ll notice that small clear-coat abrasions become visible only beyond a specific viewing angle where surface microfacets reorient reflected light. That angle threshold depends on surface roughness, clear-coat thickness, and light wavelength. Small swirls require a steeper grazing angle to produce measurable reflection intensity differences.
As you change position, individual scratches move in and out of specular alignment, modulating contrast against the base finish. For practical inspection, hold a focused light and vary viewing angle slowly. Defects crossing the threshold will suddenly appear. Quantifying that threshold helps you distinguish shallow swirls from deeper scratches without touching the surface or invoking polarization testing.
Polarization Effects On Swirls
Shifting your viewing angle not only moves scratches into and out of specular alignment, it also changes the polarization state of reflected light. This change can make swirl marks more or less visible. You’ll notice that at shallow incidence angles, polarized components dominate, enhancing contrast between micro-grooves and the surrounding clear coat.
Polarization effects alter perceived brightness as Fresnel reflectance varies with angle; the angular threshold where swirls visualization peaks depends on groove orientation, clear coat refractive index, and ambient polarization (sky, sun, artificial). Use a polarizing filter or rotate the light source to isolate polarized reflections and map where swirls register strongest. That diagnostic approach helps distinguish true clear-coat micro-scratches from diffuse scattering or contamination without invoking layer-thickness angle shifts.
Layer Thickness Angle Shift
Why does the same swirl look different from one angle to another? You observe angle shift because varying layer thickness alters light refraction thresholds across the clear coat. As incident light changes, micro-scratch facets hit different refraction angles. Therefore, haze depth and perceived contrast vary.
You can predict visibility by correlating measured layer thickness with an angle shift model: thinner clear coats lower the threshold, making shallow swirls visible over a wider range. Use a width chart of micro-scratch cross-sections to map which defects exceed the haze depth necessary for detection at given viewing angles.
Practically, you’ll measure thickness before correction and assess which swirls will remain hidden or become prominent under typical inspection angles.
Surface Contour Influence
You already noted that layer thickness changes which micro-scratch facets meet the refraction threshold. Surface contour adds a second variable by changing the local incident angle of light. You’ll observe that curved panels tilt micro-facets relative to the viewer; this raises or lowers the light refraction angle threshold at which swirls become visible.
On convex zones, grazing angles exaggerate surface texture and increase specular scattering from shallow scratches. On concave zones, angles compress reflections and can mask the same defects. Color contrast alters perceived severity: dark paints with high contrast render small angle deviations obvious while lighter finishes hide them.
When assessing damage, measure local geometry and lighting direction as rigorously as paint thickness. Both determine whether marks register optically or remain imperceptible.
Frequently Asked Questions
Can Swirl Marks Be Completely Removed at Home?
Yes, you can often remove swirl marks at home. You’ll use DIY polishing with a dual-action polisher, cutting compound, and proper pads. Home remedies like clay followed by controlled polishing help prepare surfaces but don’t abrade.
You’ll measure paint thickness first. Use two-bucket washing and microfiber, and avoid rotary buffers. Deep scratches through paint or primer won’t be fixed by home polishing and need touch-up or panel respray.
Do Darker Paints Require More Frequent Correction?
Yes, dark paint vs lighter finishes demands higher correction frequency. You’ll notice swirls and light scratches faster on black or deep colors; you’ll need correction more often to maintain gloss.
Harder paints resist defects; however, softer dark finishes will require regular compounding or polishing cycles, careful maintenance, and protective coatings. Plan shorter intervals between corrections and preventative care to keep reflectivity consistent and defects minimal.
Will Waxing Hide Swirls or Actually Remove Them?
Waxing won’t remove swirls; it fills and masks them temporarily rather than correcting the clear coat. You’ll find waxing myths and home remedies claim permanent fixes. However, wax or sealant only evens reflections and hides light clear-coat scratches until it wears off.
For true removal, you need paint correction (compounding and polishing) with thickness checks. Use proper washing to prevent further swirls, and reserve home remedies for short-term cosmetic improvement.
Can Automatic Car Washes Cause Swirl Marks?
Yes; automatic car washes can cause swirl marks. You’ll often pick up millions of tiny clear-coat scratches from spinning brushes, contaminated pads, and trapped grit. You won’t feel them, but they reflect light and worsen on dark paint.
You can prevent damage by avoiding brush washes, using touchless systems, or doing careful home removal with two-bucket washing, microfiber, and proper paint correction when necessary.
How Can I Prevent Swirls When Drying My Car?
Use the two-bucket method, grit guards, and a soft microfiber drying towel so you won’t drag contaminants across the clear coat. Rinse thoroughly, blot or gently squeegee panels, then pat-dry with clean, folded microfiber. Don’t wipe a dirty towel; change towels frequently and launder them without fabric softener.
For “discussion ideas” in car care, track towel lifespan and drying techniques to prevent swirls. Refine your routine.
Conclusion
You can distinguish paint swirl marks from scratches by focusing on measurable optical and geometric factors. Swirls are shallow, narrow haze bands that alter specular reflection and polarization at low incidence angles. Scratches are deeper, wider gouges that scatter light diffusely and remain visible at steeper viewing angles.
Measure haze width/depth, check refraction-angle shifts and polarization contrast, and note layer-thickness-induced angle changes. Use these metrics against wet/dry haze limits and critical-angle thresholds to classify defects reliably.