Panel Prep Before Wax or Sealant
You’ll prep panels so wax or sealant bonds and cures: check air temperature and RH to get dew point. Keep surface 3–5°F (2–3°C) above it and target 60–75°F (15–24°C). Postpone if below ~50°F (10°C).
Clamp edges with low‑profile, padded clamps spaced 6–8″; tighten gradually and evenly to seat seams without deforming. Protect edges with pads or tape, and inspect for light gaps. Follow these steps and you’ll learn practical tips for adjustments and curing.
Quick Overview
- Verify ambient temperature and RH; calculate dew point and ensure surface temperature stays at least 3–5°F (2–3°C) above dew point.
- Keep panel temperature between 60–75°F (15–24°C). Avoid temperatures below 50°F (10°C) or excessively hot panels that shorten product open time.
- Clean and dry the surface thoroughly. Remove contaminants, oils, and residues before applying wax or sealant.
- Clamp panel edges evenly with padded, low-profile clamps spaced about 6–8 inches; tighten gradually to achieve flush seams.
- Protect edges with soft pads or tape. Check gap uniformity and test a small area before full application.
Surface Dew Point Chart
Why check dew point before panel prep? You need to know if moisture will condense on the surface. Dew point and humidity control determine whether coatings will bond or fail. Use a dew point chart or digital meter to find the dew point from ambient temperature and RH. Then ensure surface temperature stays at least 3°F–5°F (≈2–3°C) above that point during prep and cure.
| Input | Result | Action |
|---|---|---|
| Air temp | Dew point | Calculate/chart |
| RH | Raises dew point | Tighten humidity control |
| Surface temp | Compare to dew point | Maintain margin ≥3–5°F |
If the surface is within the margin or the temperature’s falling, postpone work or improve environmental control.
Recommended Panel Temperature
Now that you’ve checked dew point and ensured the surface stays above it, focus on keeping panel temperature in the optimal range for bonding and curing. You’ll want to control heat so waxes and sealants flow, level, and cure correctly without bubbling or running. Use environmental control to stabilize conditions before application and during initial cure.
- Target 60–75°F (15–24°C): most sealants cure best here; avoid hot panels that shorten open time.
- Avoid : cold panels hinder film formation and adhesion. Warm the panel slowly if needed.
- Keep panels dry and shaded: sudden sun or wind shifts ruin laydown. Monitor with an infrared thermometer.
Work methodically. Test a small area, then apply across the panel.
Clamp Panel Edges Tight
You’ll start by choosing clamps that match the panel thickness and won’t mar paint. Then plan placement to spread pressure evenly along seams. Protect edges with soft pads, apply steady, consistent pressure, and tighten until panels sit flush without deformation.
Finish by inspecting all joints for gaps or light gaps. Adjust clamps as needed before moving on.
Proper Clamp Selection
Clamps keep panel edges tight so sealant or wax doesn’t wick under gaps during application. Pick low-profile, padded clamps that match the panel thickness and close firmly without bending or stressing the metal. You’ll verify panel alignment first; then select clamp materials—plastic or rubber-padded steel—based on firmness needed and finish protection.
Use clamps with adjustable jaws so you can fine-tune pressure without over-torquing. Inspect pads for clean, non-marking surfaces and replace any worn padding before use. Position clamps on flanges or unsupported edges only; avoid clamping through painted hem folds. Close each clamp snugly; then recheck alignment and panel gap continuity.
Work methodically; swapping clamps for ones with different jaw widths if the fit requires small adjustments.
Clamp Placement Strategy
How should you space and orient clamps to keep panel edges tight without distorting the metal? Position panel clamps evenly along the seam, roughly every 6 to 8 inches, to distribute pressure and prevent localized bending. Aim clamps perpendicular to the edge so force pulls panels together, not into or away from the body.
Use light, gradual tightening; snug them finger-tight, then incrementally add torque while checking panel alignment. Alternate clamps along the length to avoid bunching stress in one area. Where paint or trim is close, employ edge protection beneath clamp jaws to prevent marring. Still, check clearance to avoid compressing seals.
After clamping, inspect gaps and adjust sequentially until uniform. Release clamps slowly to confirm panels remain aligned before final surface prep.
Protecting Panel Edges
With clamps set and gaps checked, protect the exposed panel edges before you tighten for final seating. You’ll want thin protective tape or edge guards over paint lips to prevent clamp pressure from chipping or compressing. Align tape so it covers only the exposed metal or paint edge; excessive overlap can trap contaminants.
Review edge gaps across the panel. Consistent spacing reduces stress points when clamps draw panels together. Use a clamp strategy that places pressure at structurally sound locations; avoid soft corners or thin flange sections. Gradually tighten clamps in sequence, pausing to inspect tape placement and gap uniformity. If tape shifts, reapply before final seating. Proper edge protection preserves finish and ensures your panel bonds without edge damage.
Applying Consistent Pressure
Why start tightening gradually? You’ll avoid sudden shifts that misalign trim or pinch paint. Work methodically from one end of the panel to the other, applying even panel pressure with a soft-jawed clamp or padded vise.
Tighten in small increments: turn, set, recheck; this ensures edges seat uniformly without creating stress points. Keep clamps snug, not bone-hard. You want consistent contact for adhesives or seam sealers to bed properly and for wax cure time to be predictable.
Monitor alignment as you progress and make micro-adjustments rather than big corrections. Use protective padding at contact points to prevent marring. When all clamps are set, give the assembly a final pass to confirm even compression before moving on to topping, polishing, or protection steps.
Checking For Gaps
Before you commit the clamps, inspect every edge for gaps and uneven seating so you catch misalignment early. Work panel by panel: press along seams and visually scan for light showing through or uneven contact.
Use a straightedge or feeler gauge where needed to quantify gaps; mark spots that exceed your tolerance. Adjust clamp position and pressure to bring edges into uniform contact. Then recheck edge alignment across the full length.
If clamps introduce distortion, back off and reclamp with spacer pads to distribute force. Perform a final gaps inspection after a short dwell to confirm nothing shifted.
Only proceed to solvent or wax application once edges sit flush and alignment is consistent, preventing trapped residue or poor adhesion.
Frequently Asked Questions
What Clay Grade Is Best for Heavily Contaminated Paint?
For heavily contaminated paint, you’ll want a medium to coarse clay grade to lift embedded grime efficiently. Start with strong pre wash strategies to loosen tar and oils. Then clay with lubricant, working small panels.
After coarse claying, follow with a fine clay pass to smooth the finish. For lightly soiled cars, you can skip coarse and use fine clay only. Rinse and dry thoroughly before protection.
Can I Skip Pre-Wash on Lightly Soiled Cars?
You shouldn’t skip washing even on lightly soiled cars. The importance of pre-wash is that it lifts surface grime and road film so your Wax prep bonds properly. For lightly soiled cars, use a mild pre-wash or gentle pH neutral shampoo to avoid dragging contaminants across paint.
You’ll reduce the chance of trapping grit under protection. This will make claying easier and ensure the wax or sealant performs and lasts as intended.
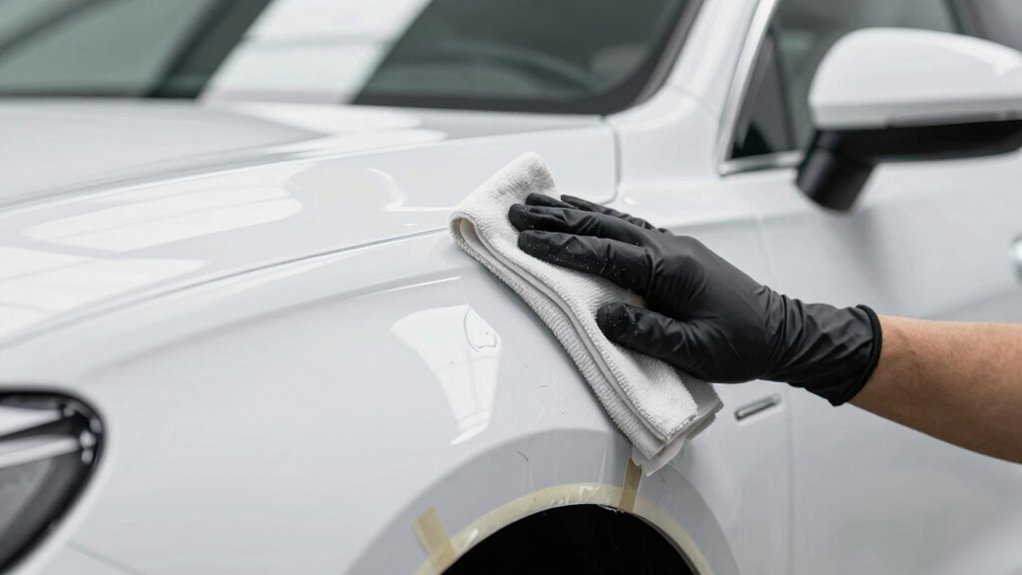
How Long Should Solvents Dwell Before Wiping?
You should let solvents dwell for 30–60 seconds before wiping. Start shorter on delicate paint and longer for stubborn residues; however, do not let solvents dry.
Use a soft microfiber to agitate gently, flipping sides as they load. Employ overlapping strokes and light pressure. Finish with a clean microfiber to remove residue and streaks.
Inspect under good light and repeat a short dwell if stubborn contaminants remain before proceeding.
Do I Need to Tape Plastic Trim Edges?
Yes, you should tape plastic edging and trim. Taping trim protects soft plastics from buffer contact, polish sling, and solvent overspray. You will block delicate seams and raised edges, reducing the risk of burns, discoloration, or adhesive lift.
Use low-tack detailing tape; press edges firmly and remove tape soon after polishing to avoid residue. Taping trim saves time and prevents rework. It ensures cleaner lines and a professional finish every time.
What Lubricant Works Best With Clay Mitts?
Use a dedicated clay lubricant like Dodo Juice Born Slippy or a pH-neutral quick detailer; they maximize lubricant compatibility and boost clay mitt performance. Spray generously, keep the surface slick, and reapply as needed to prevent marring.
Avoid high-solvent degreasers or waxy detailers that reduce glide. Test on a small area first. Work methodically, and rinse or towel-dry when claying is complete for a clean, ready surface.
Conclusion
Before you wax or seal, double-check surface dew point and temperature. Work only within recommended ranges so coatings bond properly.
Clamp edges tightly with the right clamps, placing them evenly and protecting panel edges to avoid marring. Apply consistent pressure and inspect every clamp line for gaps; fix any you find.
Taking these methodical, hands-on steps ensures a uniform surface ready for wax or sealant. This prevents failures and saves you rework.