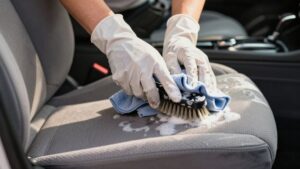
Remove Stains From Car Upholstery
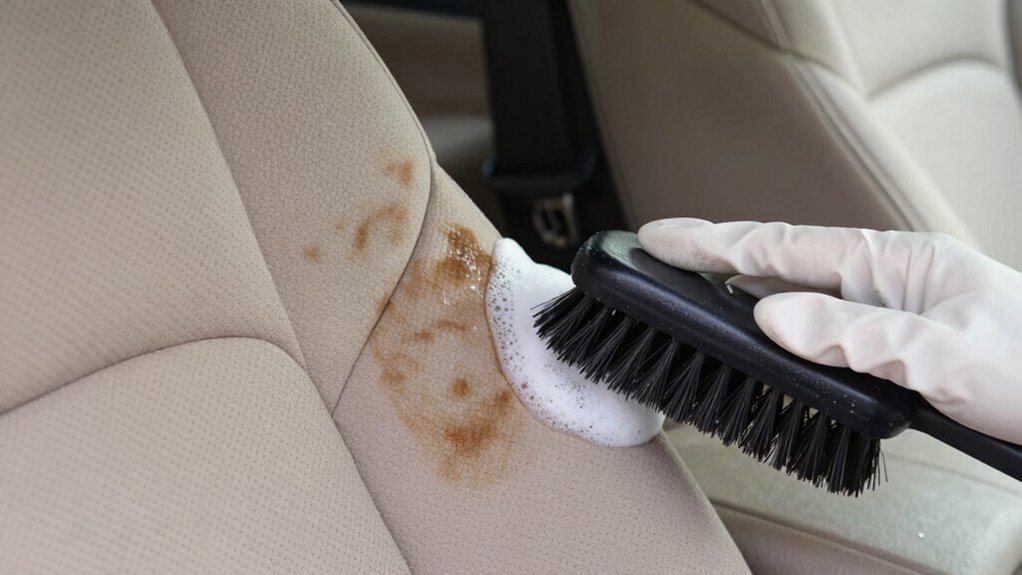
You can remove most car upholstery stains yourself by acting fast: blot liquids, vacuum loose dirt, then test a cleaner on a hidden spot.
For regular fabric spots, mix 1:10 mild detergent to warm water.
For tough stains, try 1:4 briefly; agitate gently, then blot and rinse.
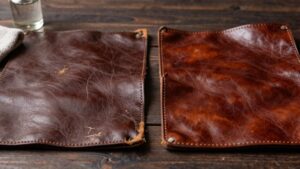
For leather, wipe immediately and condition after deep cleaning.
If you use steam, start low with short bursts.
Monitor heat and pressure to avoid shrinkage or adhesive damage. Continue for step-by-step guidance.
Quick Overview
- Blot fresh spills immediately: Blot liquids on fabric, wipe leather, then follow with a mild cleaner to prevent set-in stains.
- Start with a 1:10 mild detergent-to-warm-water solution for regular spots; spot-test hidden areas first for colorfastness.
- For heavy stains, use a stronger 1:4 detergent solution briefly; agitate gently, then rinse with a damp towel and blot dry.
- When steam-cleaning, use the lowest effective temperature and short bursts. Keep the nozzle 6–8 inches away and test first.
- Condition leather after deep cleaning; log safe methods per seat type to avoid shrinkage, dye bleed, or adhesive damage.
Fabric vs Leather Comparison Chart
How do you decide between fabric and leather upholstery for ease of cleaning and long-term care? You weigh daily effort, stain resistance, and leather durability versus fabric’s absorbency and lower replacement cost. Follow this checklist: vacuum first, test cleaners, use gentle circular motions, and condition leather after deep cleans.
| Feature | Recommendation |
|---|---|
| Spill response | Wipe leather immediately; blot fabric, then spot clean |
| Cleaning products | pH-balanced leather cleaner; fabric spray on cloth |
| Drying | Leather dries quickly; fabric needs extended air time |
| Maintenance cost | Higher for leather; lower for fabric |
| Durability note | Leather durability strong if conditioned; fabric easier to replace |
Use two word discussion ideas like “maintenance schedule” to plan routines and prevent damage.
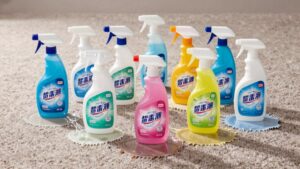
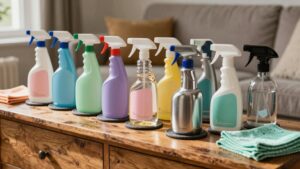
Water-Based Cleaner Ratios
After you’ve weighed fabric versus leather care and set up your cleaning checklist, you’ll want clear ratios for water-based cleaners so you mix safely and get consistent results. Start with a neutral base: 1 part mild detergent or stain neutralizers to 10 parts warm water for regular fabric spots. For tougher fabric stains, increase to 1:4; apply briefly, agitate, then blot and test for color fastness. For delicate or dyed upholstery, use 1:20 and spot-test first.
- Routine cleaning — 1:10 detergent:water; light agitation; blot dry.
- Heavy staining — 1:4; short dwell; rinse with damp towel.
- Sensitive dye — 1:20; spot-test; minimal wetting.
Steam-Cleaning Temperature Limits
Before you run a steam cleaner over upholstery, check the manufacturer’s temperature limits and set the machine to a safe steam temperature that matches the fabric heat tolerance. Monitor water vapor pressure and keep sessions short to prevent overheating damage to synthetic fibers or glued seams.
If you’re unsure, test a hidden area first. Reduce heat or use lower-pressure steam until results are confirmed.
Safe Steam Temperatures
Wondering what steam temperature you should use on car upholstery? You’ll aim for safe steam temperatures under manufacturer limits: generally keep steam delivery below 200°F at the nozzle to avoid scorching or shrinking. First, consult seat labels or your vehicle manual for fabric heat tolerance guidelines.
Test a short burst on a hidden seam for 5–10 seconds; then inspect for color change or distortion. When cleaning, hold the steamer 2–4 inches away and move continuously to prevent localized overheating. Use lower temperature settings for vinyl, suede, or treated fabrics. Higher (but still controlled) settings work on durable woven cloth.
Finish by blotting moisture with a microfiber towel and allowing full air-dry before reusing the seat.
Fabric Heat Tolerance
You’ve already tested nozzle temperature and distance; now focus on the upholstery’s heat tolerance so you don’t damage fabrics. Begin by checking manufacturer tags for max-temperature guidance; if none, test a hidden seam area.
Apply brief steam bursts at the lowest effective setting, then inspect for changes in fabric durability and any loss of color fastness. Increase temperature incrementally only after passing each check, limiting contact time to a few seconds per spot.
For synthetic blends, keep temperatures lower and allow cooling between passes. For heavy-duty woven fabrics, you can cautiously raise heat but still monitor tensile strength and dye migration.
Stop immediately if fibers shrink, pill, or dyes bleed. Switch to low-moisture cleaning.
Water Vapor Pressure
How hot can steam-cleaning get before it harms your car upholstery? You’ll control cleaning by managing water vapor temperature and pressure limits rather than guessing. Start by checking your steam unit’s gauge and set it to the lowest effective temperature for stain removal. Many fabrics need under 120°C water vapor to avoid fiber shrinkage or adhesive softening.
Monitor pressure limits so steam doesn’t force moisture into padding. Use short bursts and keep the nozzle moving 6–8 inches away. After each pass, blot with a microfiber towel to remove lifted soil and excess moisture. Repeat only if the fabric surface feels dry to the touch.
Log settings that worked for each seat type for future, consistent safe cleaning.
Manufacturer Temperature Limits
Having checked your steam unit’s gauge and tested low-temperature passes, consult each vehicle and upholstery maker’s published temperature limits before increasing heat. Next, locate manufacturer guidelines in the owner’s manual or upholstery tag. Note max surface temperatures and material-specific cautions.
Record the allowed range and set your steamer below the upper threshold, allowing margin for probe variance. Run a short timed pass on an inconspicuous area while monitoring temperature with a contact thermometer. If readings climb toward the limit, reduce steam flow or increase distance.
Log your settings for future jobs and follow any listed safety considerations, such as ventilation, drying intervals, and avoiding sealed trims. When in doubt, contact the maker. Do not improvise beyond documented limits.
Overheating Damage Risks
Any steam-cleaning session can accidentally overheat upholstery if you push temperature or dwell time past manufacturer limits. Always monitor heat and distance while you work. Check your steam cleaner’s output and compare to upholstery temperature limits in the manual or manufacturer resources before starting.
Use the lowest effective temperature, keep the nozzle moving, and maintain a safe distance to prevent localized overheating risks like fiber melting, shrinkage, adhesive failure, or discoloration. Limit passes to short bursts and allow material to cool between treatments. Test on a hidden area for 30–60 seconds.
If you detect warping, stiffening, or off-gassing, stop immediately and blot with a damp towel. Document settings that worked for future reference.
Frequently Asked Questions
Can Baking Soda Damage Colored Upholstery Over Time?
Short answer: Baking soda safety is generally good and it won’t usually damage colored upholstery if you use it correctly. You should test a small hidden area first. Use a mild paste or diluted spray; avoid soaking fabric, and rinse or blot thoroughly.
For delicate dyes or vintage fabrics, limit contact time. Repeat gently if needed, and follow with fabric protection. Regular spot-testing keeps colored upholstery care safe and effective.
How Soon Can I Sit on Cleaned Seats?
You can sit once the upholstery feels dry to the touch and no residue remains. This typically takes 30 minutes to 2 hours depending on method and ventilation.
For baking soda paste or spray, allow at least 30 minutes; then blot and air-dry. For light spray or spot treatments, 30 to 60 minutes usually suffices.
Check seating safety after cleaning by pressing a damp paper towel. If it stays dry, it is safe. Longer drying is necessary for thicker padding.
Can Pet Urine Odors Be Fully Removed?
Yes, you can fully remove pet urine odors if you act promptly and use proper methods. Start by blotting urine, then vacuum dry debris.
Apply an enzyme cleaner, following instructions and confirming enzyme cleaner safety for your upholstery. Let it sit up to 30 minutes; longer for deep odors. Agitate gently, then blot and air-dry.
Repeat treatments for stubborn smells, and finish with a fabric protector to reduce recurrence.
Are Enzyme Cleaners Safe for All Fabrics?
No, enzyme cleaners aren’t safe for all fabrics. Check enzyme safety and fabric variety first: test a hidden spot for colorfastness and fiber reaction.
Follow label dilution and dwell-time instructions. Rinse thoroughly, and blot excess moisture to avoid damage. Avoid use on silk, wool, leather, or dyed/unfinished textiles unless product specifies compatibility.
When in doubt, consult manufacturer guidance or choose a product labeled for your specific upholstery type.
How Do I Remove Cigarette Smoke Smell?
You start by airing the car: open doors, run fans, and let fresh air circulate.
Vacuum thoroughly, then wipe hard surfaces with vinegar solution. Sprinkle baking soda across fabric seats, let sit overnight, then vacuum.
Use activated charcoal or odor-absorbing bags placed inside for 48–72 hours. For stubborn smoke, steam-clean upholstery or use an ozone treatment professionally.
Repeat as needed until the two word idea, two word idea disappear.
Conclusion
You’ve got the info you need to remove upholstery stains safely: match your cleaner and method to fabric or leather, follow water-based cleaner ratios, and respect steam and manufacturer temperature limits.
Start with low heat and test a hidden spot. Increase only as needed and avoid prolonged exposure to prevent overheating damage.
Work methodically, blotting rather than rubbing. Finish by allowing the area to dry fully before using the seat.