Tar and Bug Remover Safe Use on Paint
Use tar and bug remover cautiously: check the product SDS for solvent identity and flashpoint. Wear chemical-resistant gloves (nitrile/butyl), and work outdoors or with strong ventilation. Clean the area, pick a hidden panel, apply a pea-sized amount, and follow the dwell time. Blot and inspect for softening, gloss change, or coating lift.
If there’s no damage, proceed in small increments and log product and time. Continue for stepwise testing and documentation guidance.
Quick Overview
- Check the product SDS for solvent identities and measured flashpoint before use to assess flammability and safe handling.
- Wear chemical-resistant gloves (nitrile or butyl), eye protection, and ventilate the work area to limit inhalation and skin exposure.
- Test on a hidden panel after cleaning. Apply a pea-sized amount, wait the dwell time, then blot and inspect for coating damage.
- Start treatment outward from the test spot in small increments. Note product, dilution, and time applied for traceability.
- If the SDS lacks flashpoint or solvent data, do not draw safety conclusions. Obtain complete SDS/technical data before proceeding.
Solvent Flashpoint Comparison
Wondering how the solvents in bug and tar removers compare for flashpoint and flammability? You don’t have usable flashpoint data from the available sources; therefore, you can’t draw product-specific conclusions. To assess solvent safety, you’ll need SDSs, solvent identities, and measured flashpoint temperatures before comparing flammability ratings or handling controls.
Below is a placeholder summary showing the comparison fields you’d populate after obtaining technical data.
| Parameter | Required value |
|---|---|
| Solvent ID | (e.g., hydrocarbon, alcohol) |
| Flashpoint (°C) | (SDS value) |
| Flammability class | (e.g., II, IIIA) |
| Source document | (SDS or technical spec) |
Collect SDSs, log exact flashpoint figures, and then rank solvents for solvent safety and handling precautions.
Wear Gloves, Ventilate Area
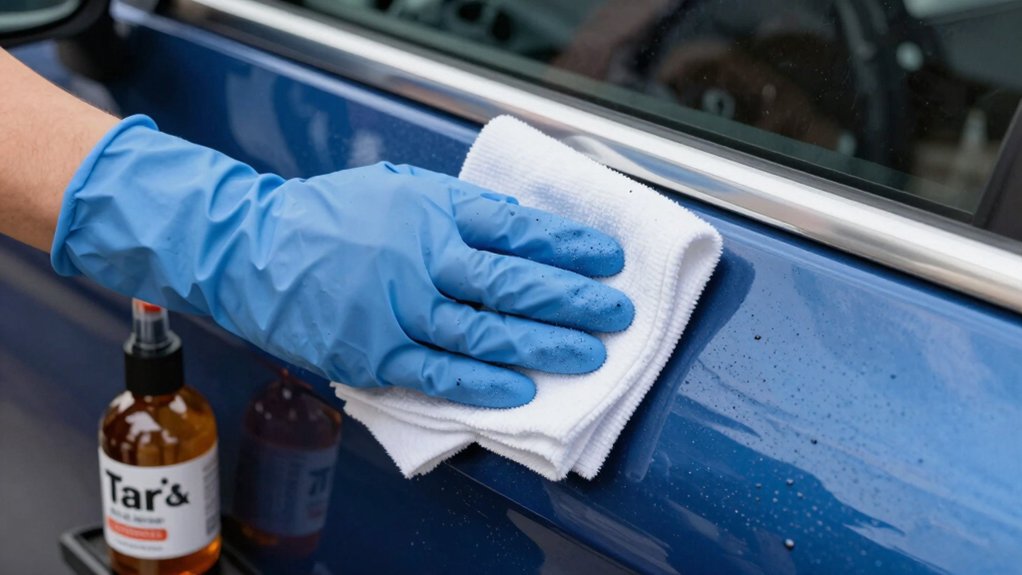
How should you protect yourself when using bug and tar removers? You should wear gloves and ventilate area to limit skin contact and inhalation of solvents. Use chemical-resistant gloves (nitrile or butyl) and avoid latex; change gloves if contaminated.
Work outdoors or with windows open and a fan to direct fumes away from you. Do not confine vapors in garages. Always test hidden panel first for material compatibility before broad application. Inspect for damage after treatment to catch coating loss, softened plastics, or stained trim.
- Choose gloves rated for solvents and pinch-test seams.
- Position exhaust or intake fans to create cross-ventilation.
- Keep a spill kit and eyewash accessible for immediate response.
Follow these controls to reduce personal and paint-system risk.
Test on Hidden Panel First
Pick an inconspicuous panel (door jamb, under bumper or behind wheel arch) and clean it thoroughly of dirt and wax before testing.
Apply a pea-sized amount of remover, wait the manufacturer’s recommended dwell time, then blot gently with a microfiber. Inspect for softening, color change, or coating loss before proceeding to visible surfaces.
Pick A Hidden Panel
Choose a discreet, inconspicuous panel: inside the door jamb, behind the fuel filler flap, or under the hood. This will allow you to test removers without risking visible damage. Pick a hidden panel near the affected area to match temperature, finish, and exposure.
Clean loose debris only enough to see the surface; don’t perform full cleaning (that’s the next step). Apply a pea-sized amount of product, wait the manufacturer dwell time, then blot with a clean microfiber. Inspect for softening, discoloration, gloss loss, or coating lift. If you see adverse effects, stop and select an alternative product or method.
Record results and location for future reference. Prioritize paint safety: when in doubt, choose gentler chemistry or professional consultation to avoid irreversible damage.
Clean Area First
Why clean the area first? You remove loose grit and surface contaminants that would abrade paint during treatment. Start by rinsing and using a pH-neutral wash to eliminate sand, road film, and residue. Dry the panel and inspect the hidden test panel chosen earlier.
On that test panel, apply the tar primer or bug-specific remover per label, letting it dwell only the recommended time. Check for paint dulling, softening, lifting of wax or ceramic protection, and compatibility with bug enzymes formulations. If you see adverse reactions, stop and select a gentler product or pre-soak method.
If unchanged, proceed to the visible area. Document results and rewash after treatment to remove solvent residues and restore protection as needed.
Apply Small Amount
With the test panel confirming compatibility, apply a small amount of remover to a cotton swab or microfiber and work only the hidden area first. You’ll limit exposure and make spotting adverse effects easier. Use targeted dabs rather than saturating cloth; keep contact minimal to preserve coatings.
Observe for immediate changes in gloss, softening, or dye transfer: these indicate compromised paint compatibility or hidden safety breaches. Log product, dilution, and time applied for traceability. If the hidden patch stays unchanged, proceed outward incrementally. If it dulls or softens, rinse and neutralize immediately and choose a milder product or pre-soak method.
Always rewash and reapply protection after successful removal to restore sacrificial layers stripped by solvents.
Wait Recommended Time
How long should you wait after applying the remover to the hidden panel? You should wait the manufacturer’s minimum dwell time: typically 30–60 seconds. Then inspect that test area. This controlled wait verifies Tar safety and Paint compatibility before you treat visible panels.
If instructions specify a shorter contact, follow them. If they recommend blotting or rinsing immediately, adhere strictly. Use a clean microfiber to remove residue and assess finish under good light. If the paint shows softening, dulling, or finish change within the specified wait, stop and rinse thoroughly. Choose a milder product or pre-soak method.
Document the safe dwell time for repeat use on that vehicle and avoid extending contact beyond the tested interval.
Inspect For Damage
Before you treat visible panels, test the remover on a hidden panel to confirm compatibility and spot any adverse reactions. You’ll apply a small amount, follow product dwell times from the label, then rinse and dry the area.
Inspect damage by comparing gloss, color shift, or softening against adjacent factory finish. Use a loupe or bright angled light to reveal micro-marring, etching, or coating lift. If you see streaking, haze, or decreased hydrophobic properties, stop and record the finding; these indicate incompatibility or overexposure.
Note substrate differences: plastic trim and clearcoat react differently. Document product, concentration, exposure time, and exact hidden panel location for later reference. This controlled test minimizes risk when treating visible panels.
Proceed If Safe
Once you confirm the hidden-panel test shows no adverse effects, proceed to treat visible panels but restrict applications to small areas and follow labeled dwell times exactly. Start at a lower exposure time and increase only if results are predictable. Document the test spot, product, and dwell time. Note compatibility with coatings and trim: if the product strips waxes or ceramic layers, plan immediate reapplication of protection post-cleaning.
Use targeted sprays or swabs; avoid broad wetting of rubber or uncoated plastics. Work on cool paint, in shade, and agitate with a soft microfiber only after the dwell interval. Rinse thoroughly, inspect for marring, and stop if visual change occurs. This ensures consistent, safe application and preserves finishes.
Frequently Asked Questions
Can I Use These Removers on Vinyl-Wrapped Cars?
Yes, many removers can work on vinyl wraps, but you should check vinyl wrap compatibility and test a small, inconspicuous area first. Use gentle, short-dwell products (Mothers, Gyeon) and avoid aggressive solvents like Rain-X that strip coatings and harm trim.
Prefer pre-soak methods and high-lubricity washes. Also, verify long term rubber safe claims for any product to prevent edge lifting, discoloration, or adhesive breakdown.
Will Products Remove Ceramic Coating Permanently?
Yes, many tar and bug removers can remove ceramic coating. The removal permanence depends on product strength and exposure. You’ll strip sacrificial top layers quickly with strong solvents, such as Rain-X or some aggressive formulas. This causes permanent loss of coating protection unless you reapply.
Milder, coating-compatible cleaners, such as CarPro or Gyeon-safe products, won’t remove coating permanently; however, they won’t restore damaged layers. Test and recoat after solvent exposure to ensure long-term protection.
Are Any Removers Safe for Rubber Trim Long-Term?
Yes, some removers can be safe for rubber trim long term if you choose compatible formulas and follow directions. You’ll want biodegradable, low-solvent products (e.g., Muc-Off with testing) or Gyeon Q2M, which is gentle on plastics. Avoid aggressive solvents like Rain-X repeatedly; they will dry and degrade trim.
Always test inconspicuous areas, limit dwell time, rinse thoroughly, and re-dress trim with a protectant to restore lipids and maximize long term safety.
How Soon Can I Wax After Treatment?
You can wax as soon as the surface is fully clean and dry; usually 30–60 minutes after rinsing and air-drying. If you used a solvent-based remover, wait 24 hours to ensure solvents evaporate.
For coated cars, check coating compatibility: many removers strip sacrificial wax and some sealants, while specific products (CarPro, Gyeon) are coating-friendly and allow immediate reapplication. Always perform a water-bead test before waxing.
Do Removers Affect Plastic Headlight Lenses?
Yes, many removers can affect plastic headlight lenses. You should test compatibility first. Some solvents, like aggressive tar removers, can haze, soften, or cause long term effects such as micro‑cracking or UV degradation.
Use products labeled safe for plastics; follow dwell times, rinse promptly, and avoid prolonged contact. For long term effects, prefer plastic‑safe formulations or pre‑soak methods. Reapply protective coatings after treatment.
Conclusion
You’ve compared solvent flashpoints and chosen safer options; however, you still should wear gloves and ventilate before you start.
Test on a hidden panel first: clean the spot, apply a small amount, and wait the manufacturer’s recommended time. Inspect for softening, discoloration, or finish loss. If there’s no damage, proceed cautiously across the rest of the panel, using minimal solvent and re-cleaning residue to protect the paint and underlying substrate.