Tire Repair Kit Components Reference
You’ll want patches (1/4″ for ≤6 mm, 5/16” for ≤8 mm; 5/16″ requires inside install), string plugs for temporary ≤6 mm seals, and valve cores torqued to about 0.6–1.0 Nm (use a calibrated tool).
Bring rubber cement/BL‑8 glue. Note cure speeds vary with 40–80°C optimal range; warm adhesives in cold weather, and avoid sidewall repairs.
Follow spacing and mount rules. Monitor temperature during heat acceleration; more guidance follows if you keep going.
Quick Overview
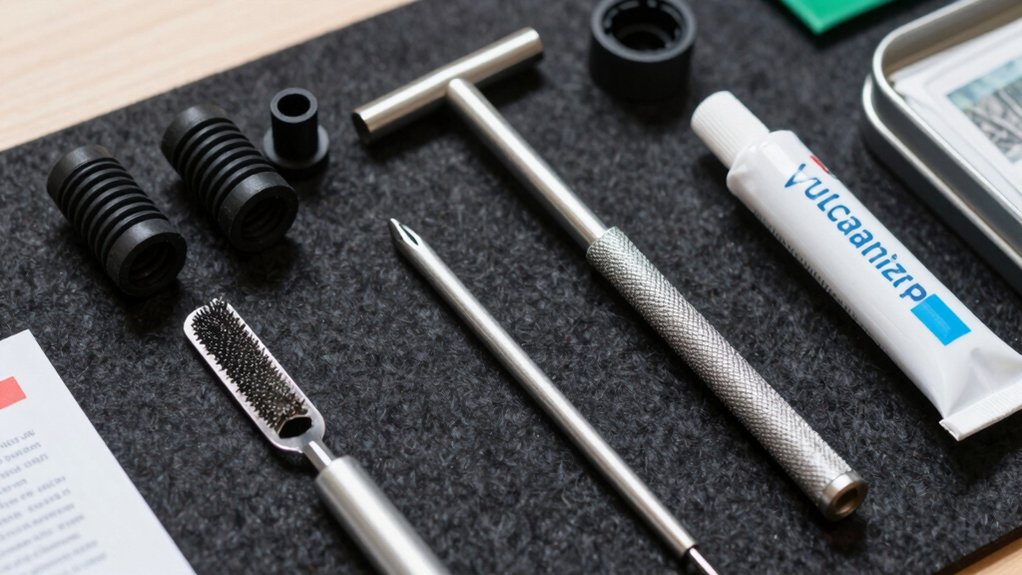
- A basic tire repair kit includes plugs, patches, vulcanizing cement, rasp and insertion tools, and a valve core tool.
- Choose plug or patch size by puncture diameter: 1/4″ ≤6 mm, 5/16″ ≤8 mm (inside install required).
- Do not repair sidewalls, shoulders, holes larger than spec, or closely spaced multiple punctures.
- Include a calibrated valve core tool and torque guidance; rubber stems typically 0.6–1.0 Nm.
- Carry temperature-appropriate adhesives and monitor cure times. Warm adhesives in cold weather and avoid overheating.
Patch Plug Dimensions
How big of a puncture can you safely repair with a plug or combo patch? You match puncture sizing to plug/stem diameter and choose combo patches for permanent, vulcanized repairs. For tread-area punctures up to the industry standard 1/4 in (6mm), you can use 1/4-in combo or string plugs. 5/16-in (8mm) combos handle slightly larger tread holes but need inside installation.
Patch compatibility depends on stem size, install method, and tire type: radial/bias tubeless only. Don’t use plugs or patches on sidewalls, shoulder areas, or where holes exceed listed max or are too close together.
| Variant | Max Puncture | Notes |
|---|---|---|
| 1/4″ combo | ≤6mm | Permanent if vulcanized |
| 5/16″ combo | ≤8mm | Inside install required |
| String plug | ≤6mm | Temporary, quick seal |
Valve Core Torque Specs
After you’ve matched plug or patch size to the puncture, check the valve assembly. Valve cores must be torqued correctly to prevent leaks or damage. You’ll use valve core torque to seat cores without deforming stems or stripping threads. Tighten to manufacturer specs, typically 0.6–1.0 Nm for rubber-stem cores; higher for high-temp or metal cores. Avoid over-torqueing. Use a calibrated valve core tool or torque screwdriver.
Remember, plug dimensions affect repair pressure and can change recommended torque when higher inflation is required.
- Use a torque tool rated in Nm for consistency.
- Inspect stem and core for damage before torquing.
- Re-check torque after initial inflation and travel.
- Replace valve core if resistance or leaks persist.
Curing Time and Temperatures
You’ll need to match cure time and temperature to the adhesive and repair method to guarantee a reliable seal. Follow the manufacturer’s recommended temperature range. Account for heat-source effects and adhesive open time, and monitor temps with a contact or infrared gauge.
Small deviations can extend cure time or compromise bond strength; therefore, document conditions and adjust procedures accordingly.
Cure Time Basics
When you apply rubber cement or BL-8 glue for a plug repair, expect the bond to set visibly within a few minutes. It will reach workable strength after 10–30 minutes depending on temperature and adhesive type. You’ll notice a thin film of sticky rubber as solvents evaporate; that tack indicates initial adhesion but not full load capacity.
Cure temperature directly affects viscosity and solvent flash-off rate; warmer conditions speed development while cold slows it. Plan your repair sequence: prepare hole, insert plug, trim excess, then wait the minimum time for handling before re-inflation. If you must drive immediately, avoid high-speed or heavy loads until the adhesive attains service strength.
Use manufacturer guidance for specific adhesives to confirm safe cure times.
Recommended Temperature Range
How hot or cold should you be for a reliable plug cure? You’ll aim for a moderate range: generally 50°F to 86°F (10°C to 30°C). Temperature considerations affect cure time and adhesive performance. Colder conditions slow rubber cement crosslinking and can prevent full bonding; excessive heat can thin adhesives and shorten working time.
At lower temperatures, allow extra dwell time before trimming. At the high end, work quickly and check tack. Store tubes at room temperature to preserve viscosity and pot life. When you can’t control ambient temperature, keep parts warm in your vehicle or shaded to avoid temperature extremes.
Follow adhesive manufacturer specs for best cure outcomes and consistent seal integrity.
Heat Source Effects
Having covered ambient temperature effects, consider how direct heat sources change cure time and peak temperatures during repair. You’ll find that localized heating, such as a heat gun, torch, or hot plate, accelerates adhesive cure; however, it raises scorching risk and can push rubber past safe temperatures. Measure surface temperature. Adhesives often cure faster between 40–80°C, but above ~120°C, you risk irreversible overheat of rubber compounds and glue degradation.
Apply brief, controlled pulses, keep the heat source moving, and monitor infrared or contact thermometers. Avoid concentrated flames near cured plugs or sidewalls. If you can’t control temperature precisely, use ambient curing and longer dwell times. Document temperature, duration, and observed bond strength for consistent, safe repairs.
Adhesive Open Time
Why does open time matter? You need predictable curing windows so adhesive bonds achieve full strength before you finish insertion and trimming. Open time defines how long the rubber cement or BL-8 glue stays workable at given ambient temperatures; too short and plugs slip, too long and contamination or sag can compromise seal and tire patch aesthetics.
Plan for lower temperatures lengthening set time and higher temperatures accelerating cure. Don’t confuse this with temperature monitoring methods. Choose glues specified for your kit and consider velcro alternatives only when temporary holds are needed during alignment. They won’t replace proper adhesive cure.
Record ambient and cure times for consistent results. Allow the recommended dwell before inflating to rated pressure.
Temperature Monitoring Methods
When should you monitor temperature during adhesive cure? You should start temperature monitoring immediately after adhesive application and continue until the specified cure window completes. Use direct temperature sensing at the adhesive-tire interface or ambient sensing nearby; interface sensing gives the most accurate cure prediction. Log time-temperature profiles to verify the adhesive reached its required hold and full cure thresholds.
If readings lag expected curves, extend clamp or dwell time before trimming plugs or re-inflating. Portable thermocouples or infrared sensors work for field use. Ensure sensors contact the rubber for interface data or are corrected for emissivity when using IR. Record peak and average temperatures, note deviations, and follow manufacturer cure charts to determine safe next steps.
Cold Weather Adjustments
How cold will affect your repair? In cold weather, you’ll see longer curing times and reduced adhesive activity; rubber cement and BL-8 glue thicken, slowing bond formation. You should warm adhesive tubes to near room temperature (about 20°C) before use and keep plugs and tools inside a heated vehicle until installation.
Expect adhesive open time to increase. Hold components steady longer and avoid immediate inflation to full pressure. Use a heated surface or hand-warming for 5–10 minutes if ambient temps drop below 5°C. After installation, let the repair cure at moderate pressure for at least twice the normal time recommended by the adhesive manufacturer.
Monitor inflation and recheck leak with soap solution; repeat if sealing is incomplete.
Frequently Asked Questions
Can I Use Plug Kits on Tubed Tires?
No, you shouldn’t use plug kits on tubed tires. Plug kits are made for tubeless tires and won’t reliably seal between tube and tire. They’re especially unsafe for sidewall punctures.
For tubed tires, remove the tube and patch or replace it; you can also use an internal patch kit designed for tubes. If a sidewall puncture exists, replace the tube and inspect the tire. Since sidewall repairs aren’t considered reliable, it is important to check thoroughly.
Are Plugs Suitable for Sidewall Punctures?
No, you shouldn’t use plugs for sidewall punctures. Sidewall punctures compromise carcass flexibility and strength; this makes plugs unreliable and unsafe. You’ll want a tire patch vs plug decision: patches (or full replacement) address structural damage better, while plugs only seal tread-area punctures.
If you see a sidewall cut, avoid driving on it. Remove the tire and consult repair guidelines or replace the tire to restore proper integrity and safety.
How Long Do Plug Tools Last With Regular Use?
With regular use, plug lifespan for tools like reamers and insertion handles is typically 1–3 years before wear affects performance. Heavy professional use shortens that to months. You should do tool maintenance after each session: clean rubber cement, lubricate moving parts, inspect tips for burrs, replace worn probes and blades, and store dry.
Proper maintenance extends service life and keeps plugs seating correctly. This prevents premature failure.
Is Rubber Cement Harmful to Skin?
Yes, rubber cement can irritate your skin and cause dermatitis with repeated skin exposure. You’ll want to avoid prolonged contact and wear gloves. Wash skin promptly with soap and water if you get cement on you.
For rubber safety, use nitrile gloves and work in ventilation to limit inhalation. Seek medical advice for persistent rash, blisters, or chemical burn symptoms. Follow product SDS instructions for safe handling and disposal.
Can Plugs Pass Vehicle Inspection Standards?
Yes, you can meet vehicle inspection standards if you follow plug kit regulations and correct procedures. You’ll need an approved plug (not a temporary string only), proper reamer and insertion tools, and rubber cement or adhesive specified by regs.
You’ll clean and roughen the hole, insert and trim the plug, then confirm airtightness and structural integrity. If the puncture’s sidewall or too large, you’ll use a patch or replace the tire.
Conclusion
You now know the critical specs for patch plugs, valve core torque, and proper curing. Follow recommended cure temperatures and monitor heat precisely to guarantee consistent bonds. Avoid open flames and use calibrated thermometers or IR guns.
Track adhesive open time and shorten procedures in cold weather; preheat components and extend cure times as needed. Apply torque values exactly. Verify seals before service return and document conditions to maintain repeatable, safe repairs.