Underbody Rust Prevention Checklist

You should target coatings rather than uniform depth: aim 0.3–0.7 mm on most panels, 0.5–1.0 mm for rubberized areas, 1–2 mm for heavy-duty spots and 2+ mm for fleet impact zones. Check seams, frame rails and wheel arches first.
At 20°C, expect a firm surface in 4–6 hours; handling strength near 24 hours and full cure by 48–72 hours. Cold or heavy coats slow cure. Test tackiness and smell before use, and keep going to learn practical application tips.
Quick Overview
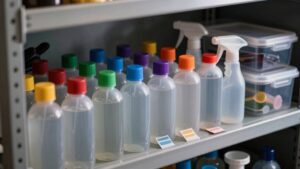
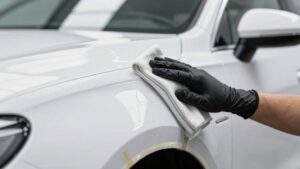
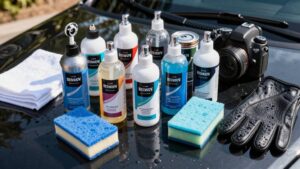
- Clean and dry the underbody thoroughly, removing dirt, grease, and loose rust before any treatment.
- Focus coatings on seams, frame rails, wheel arches, and crevices rather than aiming for uniform thickness.
- Apply appropriate coating thickness: 0.3–0.7 mm seasonal balance; 0.5–1.0 mm rubberized; 1–2 mm asphalt for heavy-duty areas.
- Monitor curing: surface firm at 4–6 hours, handling strength ~24 hours, full cure 48–72 hours at 20°C.
- Measure surface temperature and avoid application in cold or humid conditions to prevent prolonged cure and film defects.
Underbody Coating Thickness Chart
Wondering how thick your underbody coating should be for reliable protection? You’ll plan based on use: standard underbody protection targets about 500 μm dry (700 μm wet), while stone-chip or hot-melt options range higher. During underbody prep, clean, remove rust, and layer thin coats rather than one heavy pass to ensure adhesion and curing.
Check coating compatibility with vehicle materials and existing treatments: some oil-based or asphalt products bond better to rough, rust-free steel. Monitor drying times and service temperatures. Prefer tested formulations with proven salt-spray resistance. Use the table below for quick reference.
| Application | Target Thickness |
|---|---|
| Standard protection | 700 μm wet / 500 μm dry |
| Premium stone-chip | 500–1000 μm |
| Hot-melt polymer | 350–700 μm |
| Water-based | ~0.8 mm |
–5 Mm Coating Targets
How thick should your underbody coatings be in millimeters (mm) to give reliable protection? You want clear mm coating targets for consistent rust prevention. Aim for ranges that match material and exposure: thin flexible waxes need less thickness; heavy asphalt needs more. Measure wet and dry film thickness where possible, and document applied layers.
Focus on coverage of seams, frame rails, and wheel arches rather than uniform depth alone.
- 0.2–0.5 mm: thin wax/oil for crevices and cavities
- 0.5–1.0 mm: rubberized or polyurethane for general protection
- 1.0–2.0 mm: asphalt/asphalt-like for heavy-duty areas
- 2.0+ mm: commercial fleet or high-impact zones
- 0.3–0.7 mm: recommended balance for seasonal rust prevention
Curing Time at 20°C
At 20°C, you’ll want to know the typical curing time for your chosen undercoating and how temperature shifts will speed or slow that process. Aim to work within the manufacturer’s recommended drying window. Watch for factors that prolong cure, like high humidity, heavy coats, or dirty surfaces, and plan touch-up timing accordingly.
To confirm cure, perform simple checks: tack-free feel, firm film, and solvent resistance tests before reassembling or exposing the vehicle to road conditions.
Curing Time Overview
Want to know how long undercoating needs to set? At 20°C, most products develop a firm surface in 4–6 hours and reach handling strength in 24 hours. For full chemical and mechanical cure, you should allow 48–72 hours before exposing the underbody to heavy road stress.
During underbody prep, ensure surfaces are dry, degreased, and free of loose rust so coatings bond properly. Keep ventilation running and follow coating safety instructions on the label: use gloves, eye protection, and avoid inhaling fumes. Light use and occasional splashes are acceptable after 24 hours, but wait the full cure window for high-stress areas like suspension mounts and seams.
Record cure times for future maintenance scheduling.
Temperature Effects On Cure
Temperature strongly affects cure time, so factor ambient and surface temperatures into your undercoating schedule. Most products set to a firm surface in 4–6 hours and reach handling strength in 24 hours at 20°C; however, colder conditions slow chemical reactions and can double or triple those windows. Heat speeds them up and can shorten working time.
You should measure surface temperature and avoid application when metal is below recommended limits. Expect temperature dependent curing to change drying profiles: colder air raises coating viscosity changes, making atomization harder and film build uneven. Warm, dry conditions reduce viscosity and improve flow but cut open time.
Plan shorter passes in heat, longer curing stalls in cold, and store cans at moderate temperatures to keep performance predictable.
Recommended Drying Window
For reliable results, plan on a 20°C drying window where most undercoating products firm up in about 4–6 hours and reach handling strength near 24 hours. You should wait the full handling period before driving or exposing the underbody to moisture to avoid film disruption. You’ll schedule work around that baseline: apply coatings in a dry, sheltered area with stable temperatures and low humidity so the drying window matches manufacturer specs.
Check tackiness at intervals rather than relying on clock time alone. Avoid disturbing seams or fresh edges until you’ve confirmed handling strength. Note the curing conditions on the product label, record start and expected finish times, and only reassemble or lower the vehicle after the full curing period to ensure a continuous, durable film.
Factors Slowing Cure
What slows an undercoating’s cure at 20°C? Moisture, low airflow, and contaminated surfaces are the main culprits. If you apply over damp metal or don’t dry the underbody after washing, solvents can’t evaporate and film formation stalls. Poor ventilation or blocked fans trap humid air and extend tack time.
Thick, heavy coats or multiple wet layers increase cure time; follow recommended film thickness and build coats thinly. Cold spots from shade or night application slow chemical crosslinking. Contaminants such as oil, grease, and road salt residue inhibit adhesion and curing; therefore, clean thoroughly before applying.
Choose products suited to ambient conditions and use proper undercoating techniques: controlled heat, fans, and thin successive passes to speed safe, consistent rust prevention.
Testing Cure Completeness
If you want reliable protection, confirm the coating has fully cured before driving or exposing the underbody to moisture. At 20°C, most products need predictable checks rather than just clock-watching. You’ll perform tactile and visual tests: a fingernail press at multiple spots, a tack-free feel, uniform sheen, and no solvent smell.
Record cure times against manufacturer data and local conditions; that’s part of lessons learned for future jobs. Use a small tape adhesion test on edges to verify film strength without damaging coverage. Communicate results clearly to owners and service teams so stakeholder expectations match real-world readiness. If any area fails, wait additional hours and recheck rather than risking trapped moisture or compromised protection.
Post Cure Handling
At 20°C, you’ll usually need to wait a predictable window before handling the underbody. Check tactile and visual cues every hour once the product reaches its stated dry-to-touch time. Do not move, jack, or reassemble components until the coating is tack-free, evenly cured, and solvent odor has dissipated.
For post cure handling, plan at least 24–48 hours for most oil, rubberized, and asphalt-based undercoats. Faster products may allow light handling after 12 hours. Inspect beneath coating integrity by pressing a discreet edge with a fingernail and checking for indentation, stickiness, or discoloration.
When lifting or lowering the vehicle, use steady, centered jacking points to avoid flex that can crack a still-curing film. Document cure time and environmental conditions for future reference.
Frequently Asked Questions
How Often Should I Reapply Rustproofing Treatments?
You should reapply rustproofing treatments annually, but check condition every six months. How often depends on product: oil-based and lanolin need reapplication yearly or after heavy winter exposure. Wax/paraffin and rubberized may last 12 to 24 months.
Reapplication frequency also considers electronic inhibitors; they’re continuous but need system checks. Inspect coatings, touch up chips promptly, and follow undercoating safety: ventilate, avoid exhaust/brake areas, and use proper PPE.
Can Electronic Rust Inhibitors Damage Vehicle Electronics?
No, electronic rust inhibitors rarely damage vehicle electronics when installed correctly. You’ll avoid electronic interference by grounding the unit properly, following manufacturer wiring, and keeping leads away from sensor or data harnesses.
Choose a reputable corrosion inhibitors brand, mount it per instructions, and inspect connections for corrosion. If you’re unsure, have a professional install it so you won’t risk interference with ECU, CAN bus, or other sensitive systems.
Is Undercoating Safe for Painted Body Panels?
Yes, undercoating is generally safe for painted panels if you take precautions. You’ll ensure undercoating compatibility by masking painted panels and testing a small area first.
Avoid contact with fresh paint; wait for full cure to protect paint integrity. Use recommended products for seams and underbody, and clean surfaces thoroughly before application. If you’re unsure, consult a pro to prevent staining, blistering, or trapped moisture under paint.
Can I Undercoat Myself Without Professional Equipment?
Yes, you can undercoat yourself without professional equipment if you prepare, use proper products, and follow safety steps. Decide between DIY rustproofing treatments and professional service based on time and tools.
Learn how often to reapply and perform seasonal checks. Can electronic rust inhibitors damage vehicle electronics? Rarely, if installed correctly.
Is undercoating safe for painted body panels? Avoid overspray. Will undercoating affect resale value? Properly done, it can help.
Will Undercoating Affect My Vehicle’s Resale Value?
Yes, undercoating can improve resale value impacts if you emphasize underbody coating benefits. You’ll make the car more attractive to buyers by showing proactive rust prevention, documented washes and treatments, and professional receipts.
Don’t overdo visible messy coatings; clean, even application or OEM-style treatments sell better. For rusted cars, oil-based or lanolin treatments help, but disclose work honestly to avoid future disputes.
Conclusion
You’ve covered the key underbody rust-prevention points: target 5 mm coating thickness, measure and log layer depth, and allow proper curing. Aim for full cure at 20°C within the recommended drying window.
Account for temperature and humidity, slow-cure factors, and test cure completeness before handling. When working colder or wetter, extend cure times and recheck thickness.
Stay methodical, document results, and only return the vehicle to service once coating and tests confirm a complete, bonded cure.